
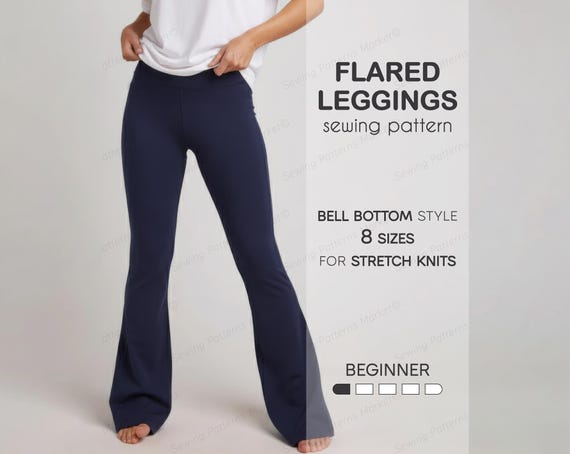
How to Make Flare Leggings Without Sewing: Easy DIY Guide
Flare leggings are back in style, and they’re not just for yoga class. These pants, with their fitted thighs and dramatic, wider bottoms, flatter many body types and bring a retro charm to everyday outfits. But what if you can’t sew, don’t own a sewing machine, or simply want a quick DIY project? Good news: you can make your own flare leggings without sewing—no needle and thread required.
This guide will show you every step and secret for transforming regular leggings into fun flare pants. Whether you want to upgrade an old pair or create a unique look, you’ll find practical methods, common mistakes to avoid, and insider tips that most beginners miss.
You’ll also discover which tools and fabrics work best, how to make the flares look professional, and how to customize them for your style. By the end, you’ll have flare leggings you’ll be proud to wear—no sewing skills needed.
Why Make Flare Leggings Without Sewing?
Many people love DIY fashion but worry about sewing. Machines can be expensive, take up space, and require skill. Hand-sewing takes time and patience. Making flare leggings without sewing is faster, more accessible, and often less risky for beginners.
Here’s why this no-sew project is so popular:
- Simple tools: You only need basic supplies, most of which you might already have at home.
- Budget-friendly: Repurpose old leggings instead of buying new ones.
- Personal touch: Add your own style with fabric choices and decorations.
- No experience needed: Anyone can do it, even if you’ve never made clothes before.
- Quick results: You’ll have new flare leggings in an afternoon.
Plus, learning to make small changes to your clothes builds confidence to try more DIY fashion projects.
Tools And Materials You’ll Need
Let’s start with the basics. To make flare leggings without sewing, gather these items:
- A pair of fitted leggings – Preferably made of stretchy, smooth material. Black or dark colors work well for a classic look, but any color is fine.
- Fabric for the flares – Choose a fabric that matches or contrasts your leggings. Stretchy fabrics like jersey, spandex, or lightweight knit are best. For bolder looks, try mesh, lace, or even patterned cotton.
- Fabric glue – Use a permanent, washable fabric glue. Check the label to ensure it works with stretch fabrics.
- Fabric scissors – Sharp scissors make clean cuts and prevent fraying.
- Measuring tape or ruler – For accuracy.
- Chalk or washable fabric marker – To mark cutting lines.
- Pins or clips – Optional, to hold fabric in place.
- Iron and ironing board – Optional, but helps smooth fabric and set glue faster.
- Old newspaper or cardboard – To protect your work surface.
Choosing The Right Fabric
The most important choice is your flare fabric. Here are some tips:
- Stretchiness: The flare fabric should stretch like your leggings, so they move together and stay comfortable.
- Weight: Lightweight or medium-weight fabrics work best. Heavy fabric can pull the leggings down.
- Color: Match for a subtle look, or contrast for something bold. Patterns and textures (like velvet or mesh) can make your flares stand out.
Don’t use stiff or thick fabrics—they won’t drape well and may look awkward.
Best Fabric Glues
Not all fabric glues are created equal. Look for permanent, washable options that say they work on stretch fabrics. A few recommended brands are:
- Aleene’s Fabric Fusion
- Dritz Liquid Stitch
- E6000 Fabri-Fuse
Test the glue on a scrap first to make sure it holds and doesn’t change the fabric color.
Planning Your Flare: Design And Size
Before you cut anything, plan your flare shape and size. This step is where your creativity shines.
Flare Shape Options
Most flare leggings have a triangle or wedge shape added to each outer seam at the bottom of the legs. You can choose:
- Wide flares: Dramatic, 70s-inspired look
- Subtle flares: Just a gentle widening
- Layered flares: Use several layers of mesh or lace for volume
Decide how high you want the flare to start (usually mid-calf or just below the knee).
Measuring The Flare
Here’s how to get the right dimensions:
- Length: Measure from the bottom of your knee to the ankle (or longer if you want extra drama).
- Width: Decide how wide you want the flare at the bottom. For big flares, 10–12 inches across when flat works well; for small flares, 5–7 inches.
- Top width: The top of the triangle should be narrow, about 1–2 inches wide, so it blends into the leg.
Pro tip: It’s better to make the flare piece a bit too big and trim later, rather than too small.
Cutting The Flare Inserts
Now comes the hands-on part. Lay out your fabric on a flat surface.
- Use your measuring tape and chalk to draw a triangle (or wedge) on the fabric. The base is the width of the flare, the height is the length from knee to ankle, and the top is the narrow end.
- Cut out two identical triangles (one for each leg).
- If your fabric frays easily, you can add a little extra around the edges for folding under later.
Example Flare Insert Sizes
Here’s a quick comparison of typical flare sizes for different looks:
| Flare Style | Base Width | Length | Best For |
|---|---|---|---|
| Classic Flare | 10 in | 14 in | Everyday wear |
| Subtle Flare | 6 in | 12 in | Office, casual |
| Super Flare | 14 in | 16 in | Costume, statement |
Use these as a starting point, but customize for your body and style.
Preparing The Leggings: Making The Slit
You’ll need to cut a slit along the outer seam of each leg to add the flare. Here’s how:
- Turn your leggings inside out.
- Lay them flat, with the outer seams facing up.
- Mark where you want the flare to start (usually a few inches below the knee).
- Using sharp fabric scissors, carefully cut up the outer seam from the hem to your mark. Only cut through one layer of fabric (not both front and back).
- Repeat for the other leg.
Non-obvious tip: If your leggings have a side stripe or decorative seam, line up your flare opening with it for a more professional look.
Attaching The Flare Inserts Without Sewing
Now you’ll glue in the flare piece. Work slowly for the best results.
- Place your leggings (inside out) on a protected surface.
- Open the slit you cut, and position the flare insert inside, with the right side of the flare fabric facing the right side of the leggings.
- Make sure the tip of the triangle is at the top of the slit, and the wide end lines up with the hem.
- Apply a thin, even line of fabric glue along the edges of the slit and the edges of the flare insert.
- Press the edges of the leggings onto the flare insert, matching the fabric edges as neatly as possible.
- Hold in place with pins or clips if needed (don’t glue the pins).
- Repeat for the other leg.
Pro tip: Don’t use too much glue. A thin layer bonds better and dries cleaner.
Setting The Glue
Most fabric glues need several hours to dry, and a full day to cure before washing or wearing. Read the instructions on your glue, but here’s a general guideline:
- Let the glue set for at least 2–4 hours before moving the leggings.
- For extra strength, place a clean cloth on top and press with a warm iron for a few seconds, if your glue allows it.
- Wait 24 hours before wearing or washing.
Non-obvious insight: If you want a cleaner inside finish, fold the raw edges of the flare fabric under before gluing. This helps prevent fraying and feels smoother against your skin.
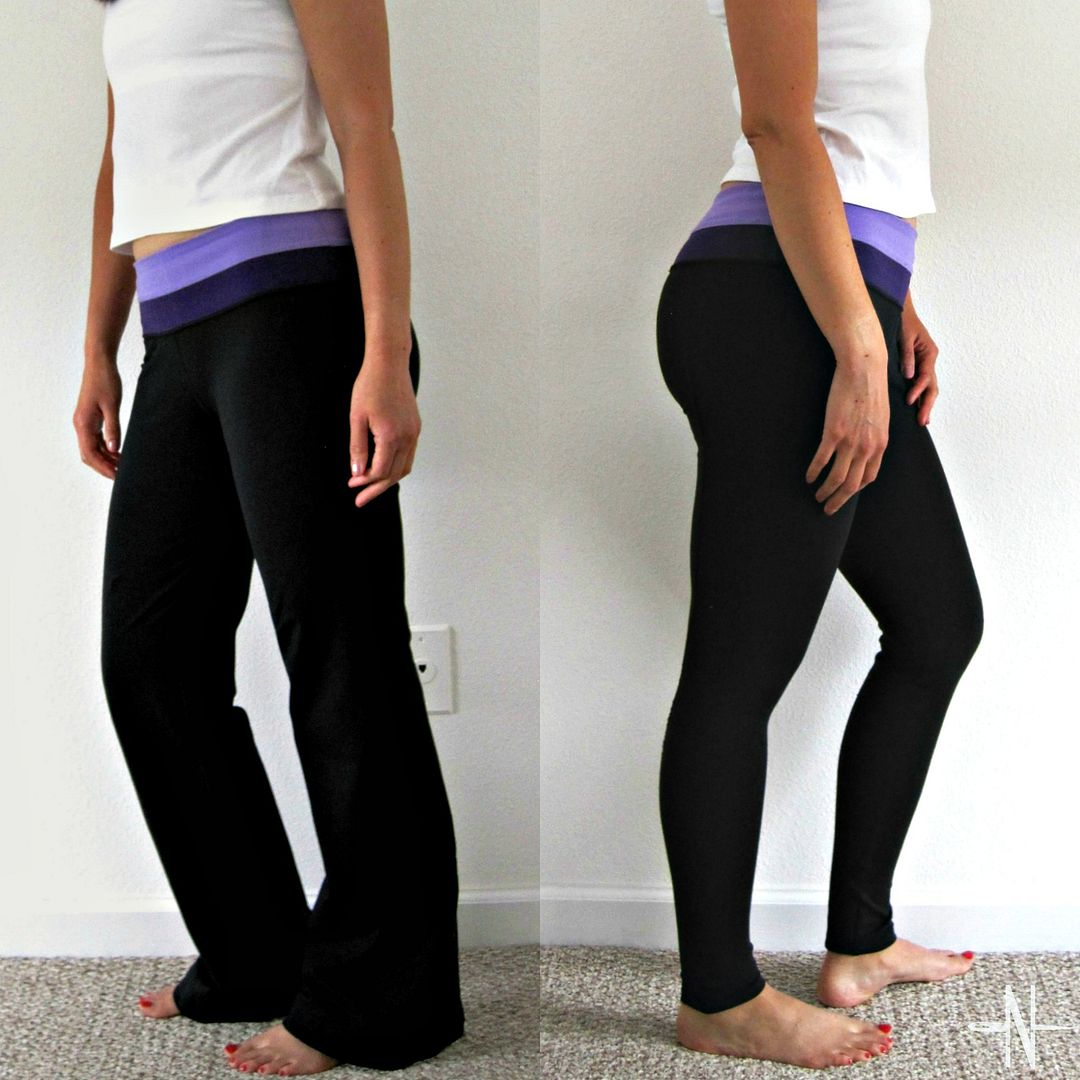
Credit: www.shesgotthenotion.com
Hemming Without Sewing
If your flare fabric is fraying or you want a more finished hem, you can use fabric glue here too.
- Fold the raw edge of the flare under about 1/4 inch.
- Apply a thin line of glue inside the fold.
- Press gently and let dry.
Alternatively, you can use iron-on hem tape for a crisp edge. Just follow the instructions on the package.
Customizing Your Flare Leggings
This is where you make your leggings unique. Try these ideas:
- Add trim: Glue ribbon, lace, or sequins along the flare edge.
- Mix fabrics: Use mesh, velvet, or animal print for the flare insert.
- Layer flares: Glue two or more flare pieces (like mesh over jersey) for a dramatic effect.
- Decorate the seam: Use fabric paint, iron-on patches, or studs where the flare meets the leggings.
You can also cut the leggings shorter before adding the flare for a cropped look.
Washing And Caring For No-sew Flare Leggings
Proper care keeps your DIY leggings looking good. Here are some tips:
- Wait 24–48 hours after gluing before the first wash.
- Hand wash in cold water for best results, or use the gentle cycle.
- Avoid hot water and high heat in the dryer, which can weaken glue bonds.
- Air dry whenever possible.
- If you notice edges coming loose, reapply a small amount of glue.
Non-obvious tip: If you use heavy or stiff fabric for the flare, store your leggings folded, not hung, to prevent stretching out the seams.
Common Mistakes And How To Avoid Them
Even simple projects can go wrong. Here’s how to sidestep the biggest pitfalls:
- Using the wrong glue: Regular craft glue won’t hold. Always use permanent, washable fabric glue made for stretch fabrics.
- Cutting too high: If you cut the slit above your knee, the flare may look odd or make the leggings fit poorly.
- Not matching stretch: Pairing a non-stretch flare fabric with stretchy leggings can cause seams to pop or the flare to hang awkwardly.
- Too much glue: Excess glue can seep out, making a mess or stiffening the fabric.
- Not letting glue cure: Wearing or washing too soon can break the bond.
- Skipping measuring: Guessing the flare size often leads to uneven results.
Measure twice, glue once.
Flare Leggings Vs. Other Diy Pant Styles
Curious how flare leggings compare to other DIY pant transformations? Here’s a quick look:
| Style | Difficulty | Tools Needed | Wearability |
|---|---|---|---|
| Flare Leggings (No-Sew) | Easy | Glue, scissors | Everyday, casual, party |
| Ripped Jeans | Easy | Scissors, tweezers | Casual, street style |
| Patchwork Pants | Medium | Glue, iron-on patches | Trendy, artsy |
| DIY Joggers | Medium | Elastic, glue/sewing | Active, lounge |
No-sew flare leggings are one of the easiest and most versatile pant upgrades you can make at home.
Advanced Tips For A Professional Look
Want your leggings to look store-bought? Try these secrets:
- Match thread color: Even if you’re not sewing, use glue that dries clear or matches your fabric.
- Smooth seams: Use a blunt tool (like the end of a marker) to press seams flat as the glue dries.
- Test your glue: Some glues make fabric stiff or shiny. Test on a scrap first.
- Trim excess fabric: After the glue dries, trim any flare pieces that stick out beyond the original seam.
- Finish inside seams: If you want to go the extra mile, glue a thin strip of fabric over the inside seam for a softer feel.
Inspiration: Creative Flare Leggings Ideas
Here are a few ways real DIYers have made their flare leggings unique:
- Festival style: Add sequined or holographic fabric for the flare.
- Boho chic: Use paisley print or tie-dye jersey.
- Sporty: Use mesh for the flares and add a matching stripe up the leg.
- Evening wear: Use black velvet for the flare and add rhinestones along the seam.
- Layered mesh: Combine two colors of mesh for a multidimensional look.
Look for inspiration on social media or in fashion magazines. Every pair can be different.
Cost And Time Comparison
How does making your own no-sew flare leggings stack up to buying or sewing?
| Method | Estimated Cost | Time Needed | Skill Level |
|---|---|---|---|
| No-Sew DIY | $10–$25 | 1–2 hours | Beginner |
| Sewing Machine DIY | $30–$50+ | 2–4 hours | Intermediate |
| Buy New | $25–$100+ | Instant | None |
DIY no-sew flare leggings are affordable and fast, perfect for one-of-a-kind style on a budget.
Real-world Example: Transforming Old Leggings
Let’s look at a practical example. Maria had a pair of plain black leggings she never wore. She wanted something fun for a music festival but didn’t own a sewing machine.
She followed these steps:
- Measured from just below her knee to her ankle (14 inches).
- Cut two triangles from sparkly blue stretch fabric (base width 12 inches).
- Marked and cut a slit on the outer seams of both legs.
- Used fabric glue to attach the flares inside the slits.
- Pressed the seams flat and let them dry for 24 hours.
- Added a line of silver ribbon to the edge of each flare for extra shine.
The result? Unique, eye-catching flare leggings that fit her perfectly and turned heads at the festival.
Sustainability: Upcycling With No-sew Flares
Making your own flare leggings isn’t just fun and cheap—it’s good for the planet. Upcycling old leggings and fabric scraps reduces waste and gives clothes a second life.
Some eco-friendly ideas:
- Use fabric from old t-shirts, dresses, or scarves for the flares.
- Swap leggings with friends and customize together.
- Save leftover fabric for future projects (like matching scrunchies).
This simple project can be part of a more sustainable fashion routine.

Credit: www.youtube.com
Where To Find Supplies
Most supplies can be found at local craft stores, fabric shops, or online. For the best deals:
- Check clearance bins for fabric remnants.
- Use old clothes as fabric sources.
- Buy fabric glue in multipacks to save money.
If you’re unsure which glue to buy, check product reviews or ask store staff for help. For more on fabric glue types, see Wikipedia’s fabric glue entry.
Frequently Asked Questions
How Long Will The Fabric Glue Hold The Flare In Place?
With the right glue and proper application, the bond can last as long as sewn seams. Most fabric glues are designed to survive many washes and regular wear. However, heavy use or frequent stretching may weaken the bond over time.
If you notice any loosening, you can always reapply glue to the edges.
Can I Use Any Type Of Leggings For This Project?
Most stretchy leggings made of cotton, spandex, or polyester blends work well. Avoid leggings that are very thin or worn out, as they may not hold the glue or flare insert securely. High-compression leggings can sometimes be too tight for glued inserts.
Is It Possible To Remove The Flares Later?
In most cases, fabric glue creates a permanent bond. Removing the flare insert without damaging the leggings is difficult. If you want a temporary flare, try using double-sided fashion tape or pinning the flare in place, but this won’t be as secure.
What If I Want To Make The Flares Even Bigger Later?
It’s possible to add extra fabric to make the flares wider, but you’ll need to carefully trim and glue a new, larger insert. Sometimes it’s easier to start over with a new pair if you want a dramatically different shape.
Will The Glue Make The Leggings Stiff Or Uncomfortable?
High-quality fabric glue dries flexible and soft if applied in thin layers. Using too much glue can make the seam stiff or sticky, so always follow the product instructions and apply as little as needed for a strong bond.
Transforming plain leggings into unique flares is satisfying and creative, even if you’ve never sewn before. With the right materials and careful steps, you can enjoy trendy, comfortable pants made by your own hands—no sewing required. Try it for your next style upgrade or as a fun group project with friends.
Fashion should be fun, affordable, and personal, and no-sew flare leggings are a perfect place to start.
Credit: www.etsy.com