
How to Flare Pants Pattern: Easy Steps for Perfect Fit
How To Flare Pants Pattern
Flaring pants is a classic way to add style, comfort, and movement to your wardrobe. If you’re interested in sewing or want to update your current pants, learning how to flare a pants pattern is a valuable skill. Many fashion lovers and sewing enthusiasts want that perfect flare, but often feel lost about where to begin.
The process can seem complicated, but with the right steps and a clear understanding of the basics, anyone can achieve a professional look. This guide will show you, step by step, how to flare a pants pattern, helping you to create pants that fit your style and body shape.
Fashion trends come and go, but flared pants remain a favorite for their unique silhouette and versatility. From subtle bootcut to dramatic bell bottoms, the options are endless. Adding a flare to your pants pattern can transform a basic pair into something truly special.
Whether you sew for yourself, for others, or simply want to understand how garments are made, mastering the flared pants pattern opens up new design possibilities. This article explains the entire process—from choosing a base pattern, making key adjustments, and sewing, to advanced tips for the best results.
Understanding Flared Pants
Before you start altering patterns, it’s important to know what makes flared pants different. Flared pants are fitted at the waist and hips, and gradually widen from the knee or below. The degree of flare can vary greatly. Some styles feature a slight flare, while others are wide and dramatic. The key is that the flare creates a relaxed, flowing shape, giving the pants a distinct look compared to straight or skinny styles.
There are several main types of flared pants:
- Bootcut – Slight flare, just enough to fit over boots.
- Classic Flare – Noticeable widening from the knee down.
- Bell Bottoms – Very wide flare, often starting at the knee.
- Palazzo – Wide from the hip, with a straight or even greater flare.
Each style has its own appeal and suits different body types. When you learn how to flare a pants pattern, you gain control over the final look.
Choosing The Right Base Pattern
Not all pants patterns are created equal. To create flared pants, you need a base pattern (often called a sloper or block) that fits you well at the waist, hips, and thighs. Starting from a well-fitting straight or slightly tapered pants pattern is ideal. Avoid patterns with unusual seams or design features, as these can complicate the alteration process.
When selecting your base pattern, consider these factors:
- Fit: The pattern should fit your hips and waist without being too tight or loose.
- Seam allowance: Make sure you know whether the seam allowance is included or needs to be added.
- Rise: High, mid, or low rise will affect the overall look. Choose what’s comfortable for you.
If you don’t have a custom-fitted pattern, you can use a commercial pattern and adjust it to your measurements. If your base pattern is too loose or too tight, the flare may not hang as intended.
Tools And Materials Needed
Before modifying your pants pattern, gather the necessary tools:
- Pattern paper or tracing paper
- Pencil and eraser
- Ruler (straight and curved)
- Measuring tape
- Scissors (for paper and fabric)
- Pins or pattern weights
- French curve (helpful for smooth lines)
- Tape (masking or clear)
Having these tools ready will make the process smoother and more accurate.
Taking Accurate Measurements
Accurate measurements are key for a well-fitting flare. Focus on the following areas:
- Waist – Measure at your natural waistline.
- Hips – Measure at the fullest part of your hips.
- Thigh – Measure around the widest part of your thigh.
- Knee – Measure at the center of your knee.
- Inseam – From crotch to the desired hem.
- Flare width – Decide how wide you want the flare at the hem.
Write your measurements down. Even a small error can affect the fit and appearance of the final pants.
Planning The Flare
This is the creative part—deciding how dramatic or subtle you want your flare. The flare can start at the knee, mid-thigh, or even higher, depending on the style you want.
- Subtle Flare: Add 2–4 inches (5–10 cm) on each side at the hem.
- Classic Flare: Add 5–8 inches (12–20 cm) on each side at the hem.
- Extreme Flare/Bell Bottom: Add 10 inches (25 cm) or more on each side.
Measure out from the original hemline to mark the new width. For a balanced look, add the same amount to both the inner and outer seams, or only to the outer seam for a more traditional flare.
Altering The Pattern For Flare
Now, let’s get practical. Here’s a step-by-step method to flare your pants pattern:
1. Trace Your Base Pattern
Lay your base pants pattern on pattern paper and trace around the front and back leg pieces. Mark all notches, grainlines, and other details.
2. Draw The Flare Lines
From the knee level (or your chosen starting point), use a ruler to draw a straight line from the knee to the hem. Decide if you want the flare to start higher or lower for a different look.
3. Add The Flare
Measure out from the hem edge, using your planned flare width. Mark the new hem point on both the inner and outer seam. Connect these points to the knee level with a smooth line using a ruler or French curve.
Example:
If your base hem is 8 inches wide and you want to add 6 inches of flare, the new hem will be 14 inches wide.
4. True The Seam Lines
“Trueing” means making sure the new seam lines blend smoothly with the original pattern. Use a French curve to create a gentle, natural transition from the knee to the new hem. Avoid sharp angles or abrupt changes.
5. Repeat For Back Leg
Repeat the same process for the back pattern piece, ensuring the flare is symmetrical. The front and back flare should match at the side seams.
6. Add Seam Allowances
If your pattern does not include seam allowances, add them now. Typically, 1/2 inch (1. 2 cm) is standard for side seams and inseams.
7. Label And Cut
Label your altered pattern pieces, marking the grainline, notches, and the new flare. Cut out the pattern pieces.
Common Flare Pattern Methods
Different methods can be used to add flare, depending on your skill and the effect you want. Here are the most common:
The “slash And Spread” Method
This classic method gives you control over the flare’s shape.
- Draw vertical lines from the hem to the knee (or higher) on your pattern.
- Cut along these lines, leaving a hinge at the knee.
- Spread the pieces apart at the hem to add the desired flare.
- Tape the pieces to new pattern paper.
- Redraw the hem and side seams for smoothness.
This method allows for even distribution of the flare.
Adding Flare To Only One Side
Some designs flare only at the outer seam. In this case, add the extra width only to the side seam from knee to hem. This creates an asymmetrical flare, which can be modern and stylish.
Combining Flare With Other Design Features
You can combine a flare with other changes, such as:
- High waist
- Pockets
- Front or side slits
Plan these features before you alter the pattern, as they may affect seam placement.
Adjusting Length For Flared Pants
When you add flare, the hem circumference increases, which can make the pants appear shorter. To avoid this, you may need to add extra length to your pattern—especially for dramatic flares.
For standard heels, add 1–2 inches (2. 5–5 cm). For very wide flares, add up to 3 inches (7. 5 cm). Always check the length before cutting your fabric.
Choosing Fabrics For Flared Pants
Fabric choice is just as important as pattern. The drape, stretch, and weight of the fabric affect how the flare looks and moves.
Best fabrics for flared pants:
- Denim – Holds shape well, classic for bootcut and bell bottoms.
- Twill – Durable, crisp lines.
- Cotton blends – Comfortable, easy to sew.
- Stretch fabrics – Great for fitted styles; allows movement.
- Lightweight wool – Elegant drape, perfect for workwear.
- Rayon or viscose – Soft and flowing for wide-leg styles.
Avoid stiff or bulky fabrics for extreme flares, as they can look awkward. For subtle flares, medium-weight fabrics work best.
Laying Out And Cutting Your Fabric
Once your pattern is ready, follow these steps for best results:
- Pre-wash your fabric to avoid shrinkage.
- Lay out the fabric on a large, flat surface.
- Pin or weigh down your pattern pieces, aligning the grainlines.
- Cut carefully, especially around curved flare areas.
- Mark all notches and details for easier assembly.
If your fabric has a nap (like corduroy or velvet), make sure all pieces face the same direction.
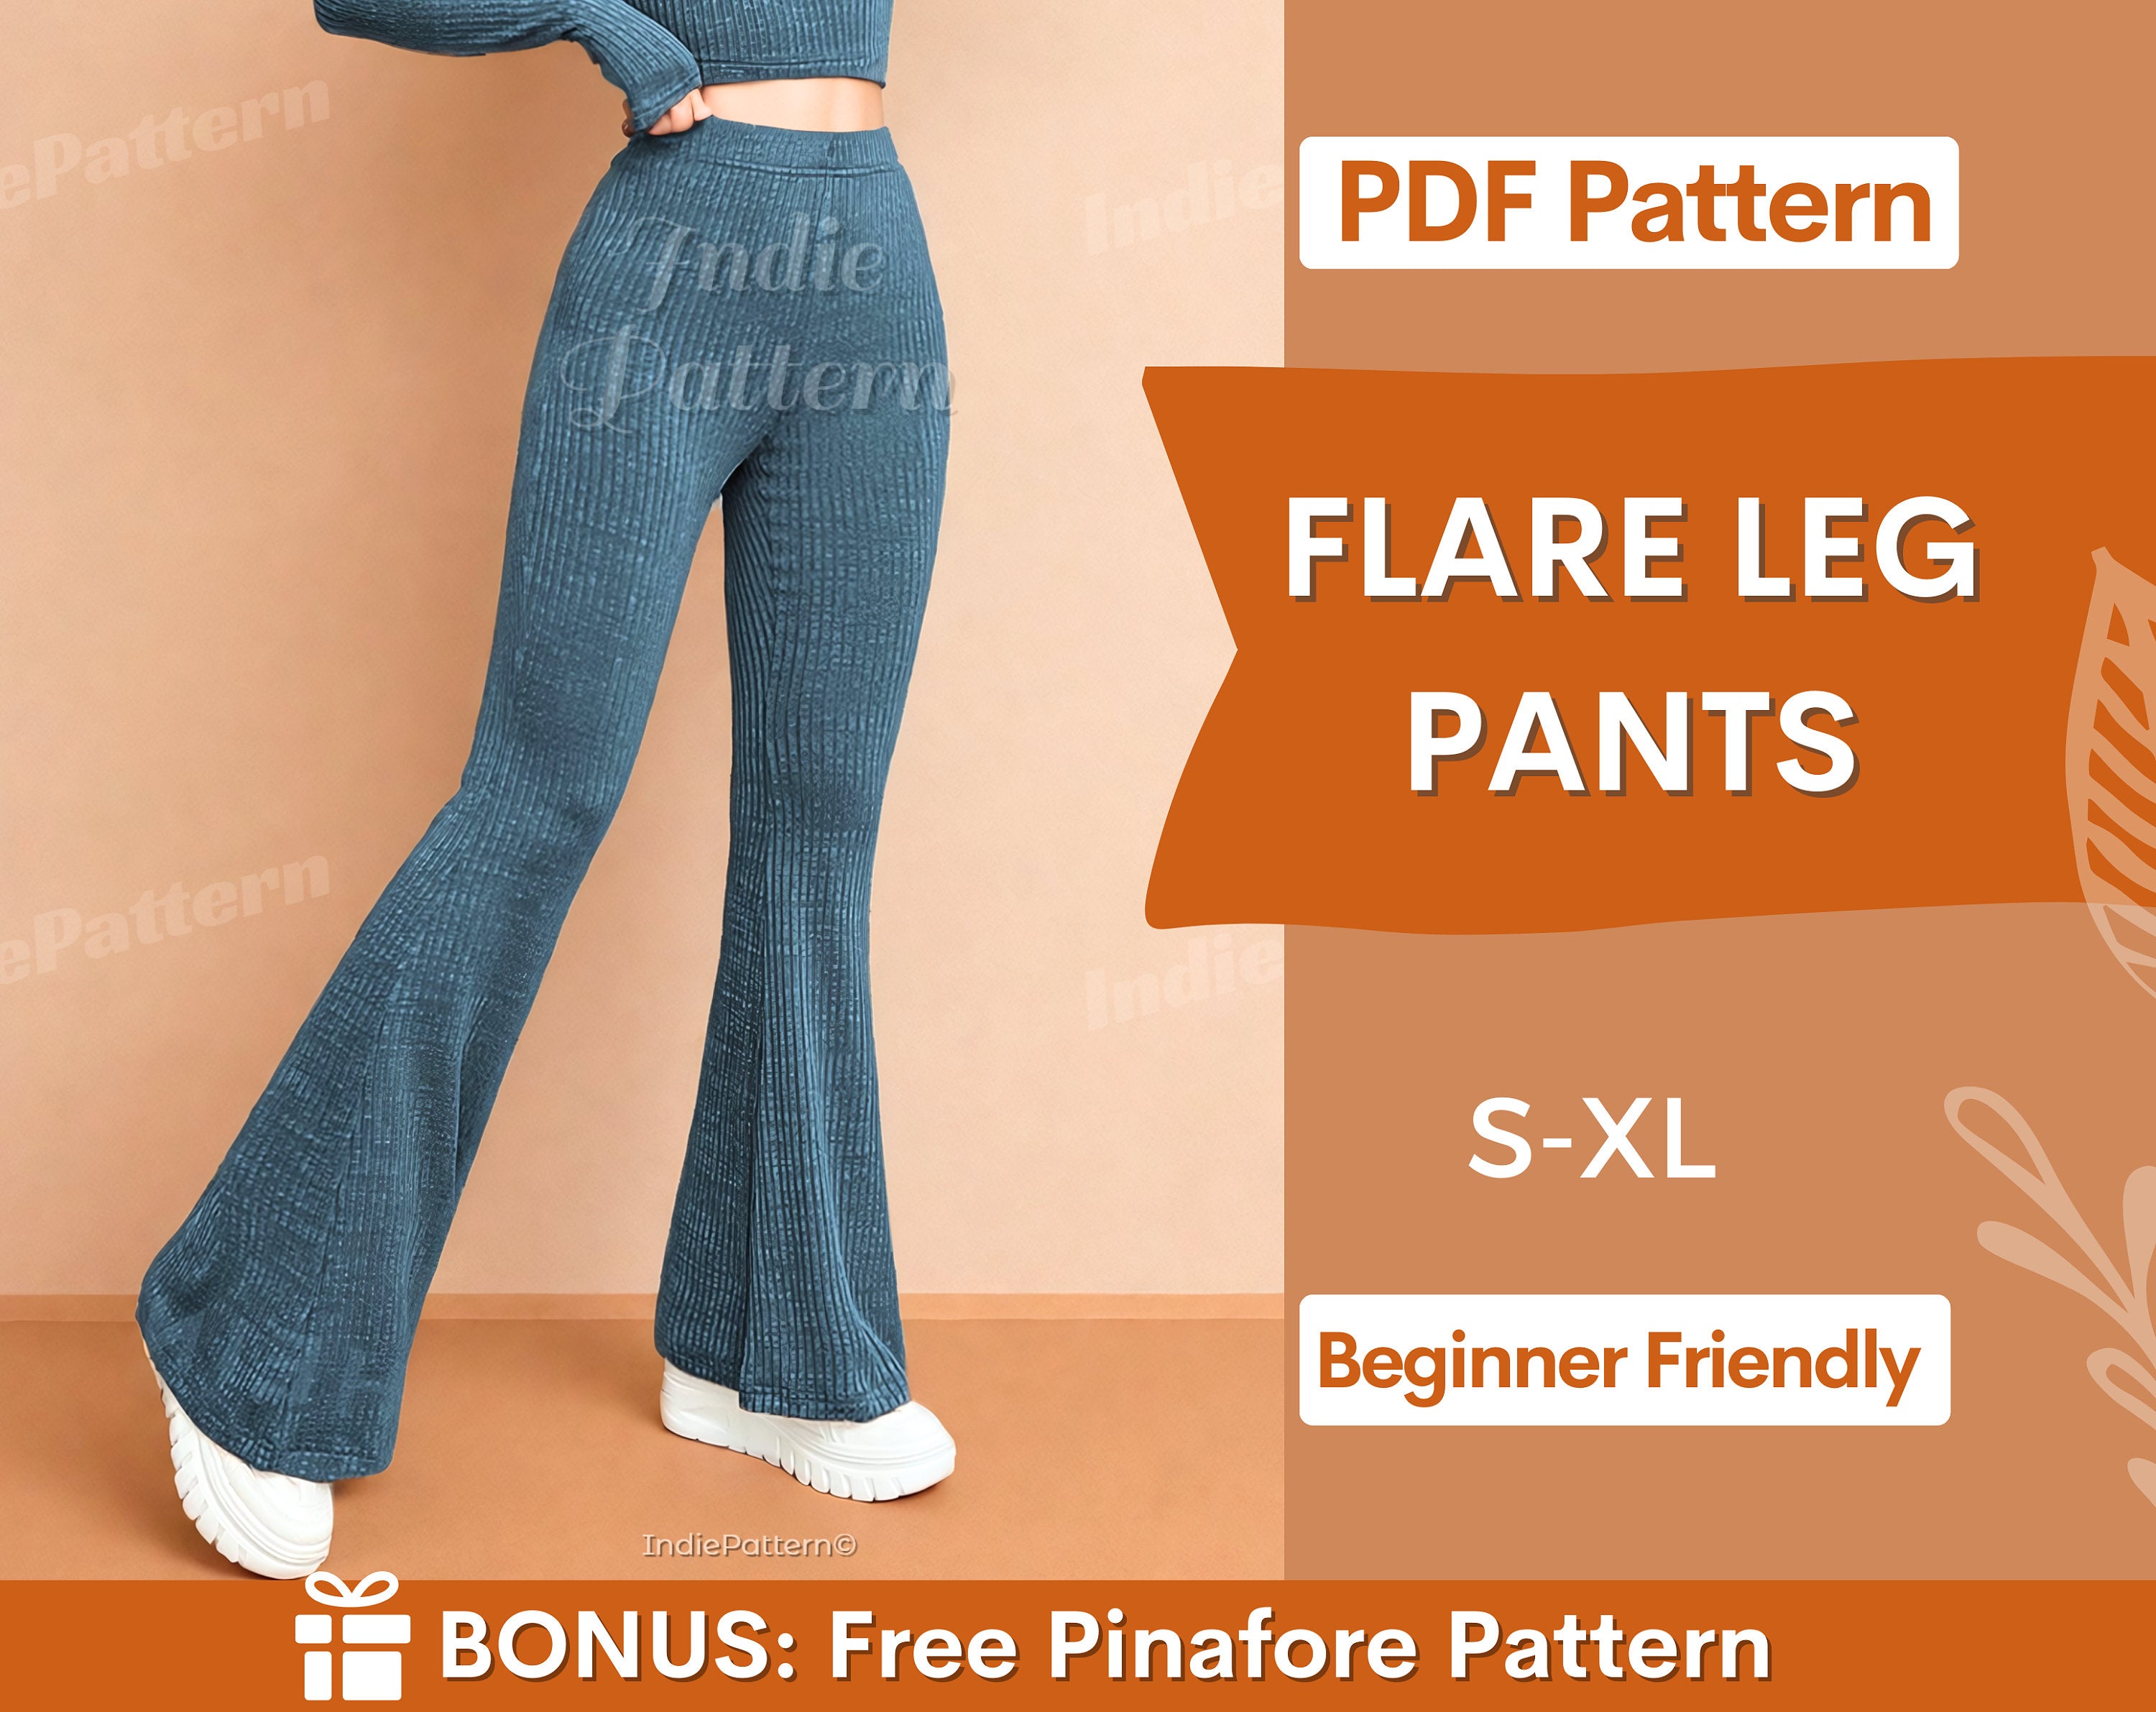
Credit: indie-pattern.com
Sewing Flared Pants
Sewing flared pants is similar to standard pants, with a few extra considerations:
1. Assemble The Legs
Sew the inner and outer leg seams. Press seams open for a neat finish.
2. Sew The Crotch Seam
With right sides together, align and sew the front and back pieces at the crotch. Reinforce the curve if needed.
3. Attach The Waistband
Sew the waistband according to your pattern instructions. Add interfacing for structure.
4. Finish The Hem
For flared hems, a narrow hem works best. If your fabric frays, finish the raw edge first.
5. Insert Zipper Or Closure
Most flared pants use a side or back zipper. Test the fit before finalizing.
6. Final Pressing
Press all seams for a crisp, professional look.
Tip: Use a tailor’s ham to press curved seams around the flare.
Fitting And Adjustments
After sewing a test garment (muslin), try on the pants and check for:
- Smooth fit at the waist and hips
- Even flare on both legs
- Correct length, especially if wearing heels
Make adjustments to the pattern as needed. Don’t skip this step—small tweaks can make a huge difference in comfort and appearance.
Comparing Flare Types
To help visualize the differences, see how various flare styles compare in terms of width and starting point:
| Flare Style | Flare Starts At | Hem Width (per leg) | Overall Look |
|---|---|---|---|
| Bootcut | Mid-calf | +2–3 inches | Subtle, classic |
| Classic Flare | Knee | +4–8 inches | Noticeable, balanced |
| Bell Bottom | Knee | +10 inches or more | Bold, retro |
| Palazzo | Hip | Wide | Flowing, dramatic |
Common Mistakes When Flaring Pants Patterns
Avoid these frequent pitfalls for a more professional result:
- Adding too much flare too quickly, causing the pants to look awkward or unbalanced.
- Ignoring grainline when adjusting the pattern, which can lead to twisted or uneven legs.
- Not trueing seam lines, resulting in sharp angles or puckering.
- Skipping test garments (muslins), which can hide fit problems until it’s too late.
- Choosing the wrong fabric for the style, making the flare stiff or limp.
Advanced Tips For A Perfect Flare
Even experienced sewists can improve their flared pants with a few expert techniques:
- Blend the flare smoothly from the knee to the hem using a French curve for a natural flow.
- Adjust the flare for your height—petite figures may need a less dramatic flare, while taller wearers can handle more.
- Balance the flare with your shoes—try on with your intended shoes before hemming.
- Use stay-stitching along curved areas to prevent stretching, especially on lightweight fabrics.
- Reinforce stress points (like the crotch seam) for durability.
Adding Design Details
Flared pants offer a blank canvas for creative touches. Consider adding:
- Decorative topstitching along the side seams or flare lines.
- Contrast panels or inserts for a unique look.
- Pockets—side, welt, or patch pockets all work well.
- Split hems or high slits for extra movement.
Just remember, each detail may require small changes to your pattern.
Adjusting For Different Body Types
Not all flares suit all body types equally. Here are some guidelines for choosing and adjusting your flare:
- Petite: Go for a moderate flare that starts just below the knee.
- Tall: Try a dramatic bell-bottom or palazzo style.
- Curvy: Choose a flare that balances your hips, with a wider hem for proportion.
- Slim: Slim flares or bootcut styles add curves and balance.
Always test your pattern with a muslin before cutting into your final fabric.
Caring For Flared Pants
Proper care will help your handmade flared pants look good longer:
- Follow fabric washing instructions to avoid shrinking or fading.
- Hang pants to dry to prevent stretching.
- Press flares gently to keep the shape crisp.
- Store flat or on a pants hanger to avoid wrinkles at the hem.
Well-made flared pants can last for years with the right care.
Real-life Example: Transforming Straight Pants To Flared
Let’s see a practical example to tie everything together.
Imagine you have a straight-leg pants pattern with a 16-inch hem circumference per leg. You want a classic flare, adding 6 inches to each leg’s hem.
- Trace the original pattern onto paper.
- Mark the knee level on both inner and outer seams.
- At the hem, measure 3 inches out from each side seam (total 6 inches added).
- Draw smooth lines from the knee to the new hem points.
- True the seams with a French curve.
- Cut out the new pattern and sew a test version.
- Try on the muslin; adjust the flare or length if needed.
This method can be used to transform almost any basic pants pattern.
Visualizing Flare: How Flare Changes The Silhouette
To better understand how flare affects pants shape, see the comparison below:
| Style | Thigh Fit | Knee Fit | Hem Fit |
|---|---|---|---|
| Straight Leg | Fitted/Loose | Same as thigh | Same as thigh |
| Flared | Fitted | Fitted | Wider than knee |
| Bell Bottom | Fitted | Narrow | Much wider |
You can see how the flare changes the overall look of the pants, making legs appear longer and giving more movement.
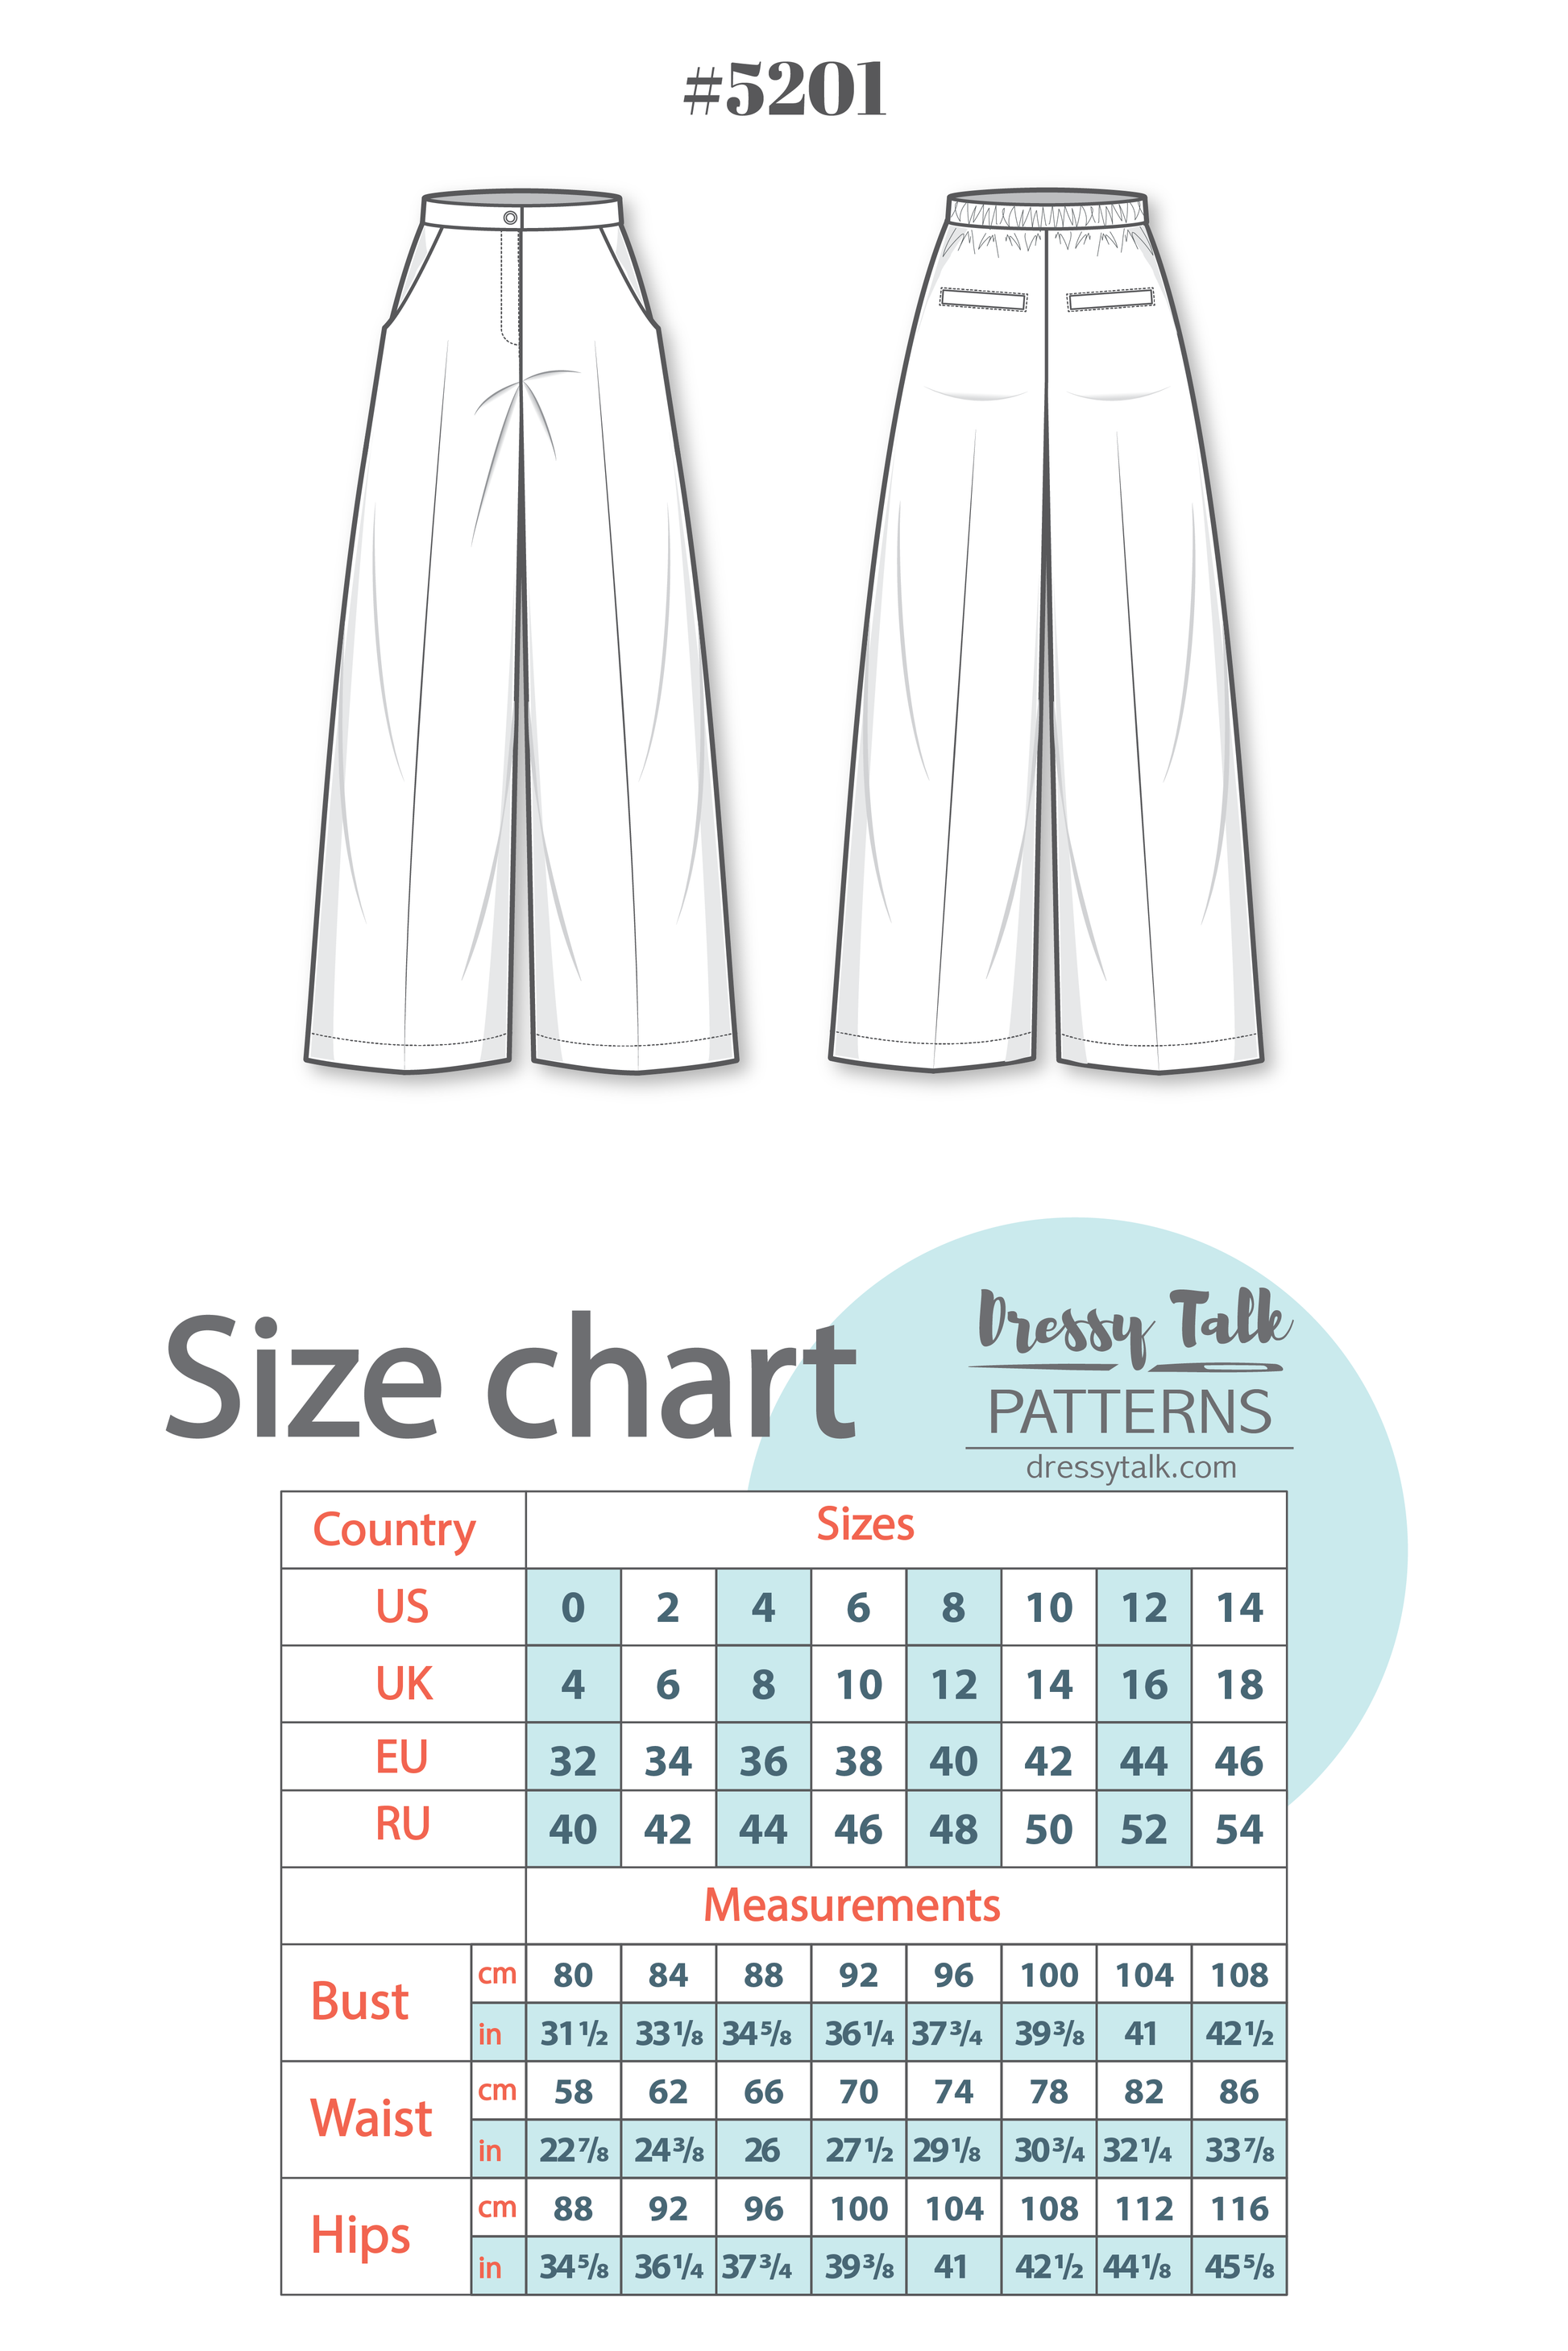
Credit: dressytalk.com
Incorporating Trends Into Flared Pants
Fashion trends often influence the details of flared pants:
- Raw hems for a relaxed look
- High-waisted flares for a vintage vibe
- Decorative embroidery on the flare portion
- Color blocking or bold prints
Don’t be afraid to experiment with these trends in your patterns.
When To Use Professional Help
If you’re struggling with pattern adjustments or fitting issues, consider visiting a tailor or professional pattern maker. They can help you fine-tune the fit and flare, saving time and reducing frustration. Sometimes, a second opinion helps spot problems you might miss.
Further Learning And Resources
There are many tutorials, classes, and patternmaking books that cover flared pants. For in-depth patternmaking knowledge, you can explore resources like the Wikipedia sewing pattern page. Practice is key—don’t be discouraged by early mistakes.
Frequently Asked Questions
How Much Flare Should I Add To My Pants Pattern?
The amount of flare depends on your style preference. For a subtle bootcut, add 2–3 inches at the hem per leg. For a classic flare, 4–8 inches is common. Bell bottoms often use 10 inches or more. Always test with a muslin to see what looks best on you.
Can I Flare Pants With Side Seams Only?
Yes, you can add flare to only the side seam for a modern or asymmetrical look. This will make the flare more dramatic on the outer leg. Just be sure to blend the new seam smoothly with the original pattern, so the pants hang correctly.
What Is The “slash And Spread” Method?
The “slash and spread” method is a patternmaking technique where you cut vertical lines in the pattern and spread them apart to add width at the hem. This creates an even, controlled flare and is easy to adjust for different amounts of flare.
Do I Need To Adjust The Length When Adding A Flare?
Yes, adding flare can visually shorten the pants. For moderate flares, add 1–2 inches to the length. For wide flares or bell bottoms, add up to 3 inches. Always check the length while wearing your intended shoes before final hemming.
Which Fabrics Work Best For Flared Pants?
Medium- to heavyweight fabrics with good drape are ideal—like denim, twill, lightweight wool, or rayon blends. Stretch fabrics can also work for fitted flares. Avoid stiff fabrics for wide flares, as they don’t move well and may look awkward.
Flared pants are a stylish and versatile choice, whether you’re updating your wardrobe or creating a unique piece from scratch. With careful planning, the right pattern adjustments, and a creative approach, you can master how to flare a pants pattern and enjoy results that fit you perfectly.
Take your time, test your pattern, and don’t be afraid to experiment with different styles and fabrics. The world of flared pants is wide open—let your creativity shine.

Credit: www.sewdiy.com