
How to Fix Flare Leggings That are Too Long: Easy Solutions
How To Fix Flare Leggings That Are Too Long
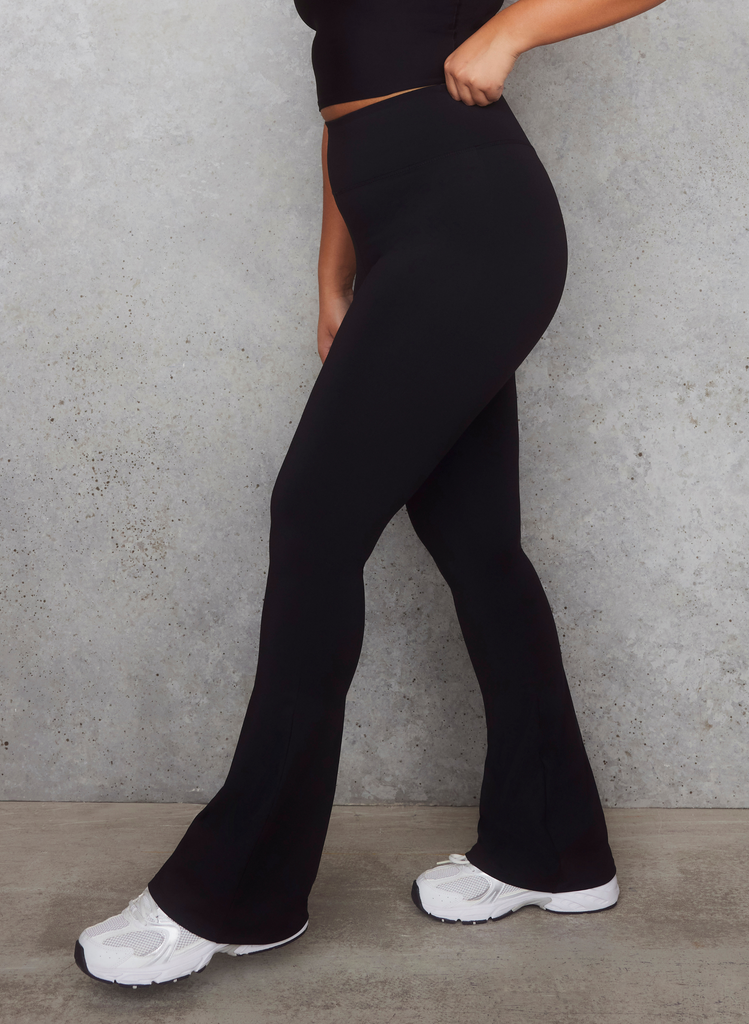
Flare leggings are back in fashion, loved for their comfortable fit and flattering style. But if you’re not tall or bought the wrong size, you might find your flare leggings dragging on the floor. This is more than a small problem—long hems can make you trip, collect dirt, or even ruin the fabric. Fixing leggings that are too long is easier than many people think. You don’t need to be a pro tailor, and you don’t always need special tools. This guide will take you through every method, from simple hacks to more advanced sewing solutions. You’ll learn how to adjust the length, keep the flare shape, and make your leggings look store-bought, not DIY.
Why Flare Leggings Need Special Care
Flare leggings have wider bottoms, so fixing the length isn’t the same as hemming straight pants. The flare shape can be ruined if you just cut and fold. If you don’t do it right, you might end up with an awkward look or a hem that flips up. Also, many flare leggings use stretchy or synthetic fabrics, which need special handling to avoid fraying or puckering. That’s why you need solutions made for this unique style.
Understanding The Fabric And Flare
Before you start, check your fabric. Are your leggings made of cotton, polyester, or a spandex blend? Each type reacts differently to scissors, glue, and thread. For example, spandex blends are stretchy and need a hem that can stretch, too. Some leggings have a raw edge that doesn’t fray, while others unravel easily. The width of the flare matters as well—wider flares need even more care to keep the shape when shortening. If you’re unsure, test your method on a small piece of fabric first.
Simple No-sew Solutions
Not everyone owns a sewing machine or wants to sew. Luckily, there are several ways to fix the length without a needle and thread.
1. Fabric Tape
Fabric tape is a double-sided adhesive that works well for hemming. Here’s how to use it:
- Turn your leggings inside out.
- Fold the hem up to your desired length.
- Place the tape between the fold and press with a warm (not hot) iron, or just press by hand if the tape allows.
- Hold for a few seconds, then let cool.
Fabric tape is great for quick fixes, but it might not last through many washes. It’s perfect for a night out or a trip when you need a fast solution. If you want it to last, choose a washable version.
2. Heat-bond Hemming Tape
Heat-bond tape is activated with an iron. It melts slightly, fusing the fabric together. This method works best on synthetic or polyester blends. Just remember:
- Set your iron to the right temperature for your fabric.
- Use a pressing cloth to avoid melting synthetic fibers.
- Hold the iron for 10-15 seconds, moving slowly.
Heat-bond tape gives a clean look, but it’s harder to adjust later. Measure carefully before ironing.
3. Safety Pins (temporary)
Safety pins are a practical choice if you’re in a hurry or want a non-permanent fix. Simply fold the hem inside and pin around the flare. Choose small, sharp pins that won’t poke you or show through the fabric. This works best for dark leggings or casual wear, as pins might be visible on light colors.
4. Fashion Tape For One-time Use
Fashion tape is designed to keep clothes in place for a few hours. It’s similar to fabric tape but less durable. Use this if you have an event and don’t want to cut or sew your leggings. Remember, it’s not meant for washing or long-term wear.
Sewing Solutions For A Lasting Finish
If you want your leggings to look professional and last, sewing is the best option. You don’t need to be an expert—just a little patience and the right steps.
1. Hand-sewing A Stretch Hem
If you don’t have a sewing machine, you can sew by hand. Here’s what to do:
- Turn your leggings inside out.
- Fold the bottom up to the desired length, pin in place.
- Use a stretch stitch (like a simple zigzag or overcast stitch) with a needle for knits.
- Sew carefully around the flare, keeping the stitches even and not too tight.
A stretch hem allows your leggings to move with you and keeps the flare looking natural.
2. Using A Sewing Machine
If you have a sewing machine with a stretch or zigzag setting, this method is fast and strong.
- Mark the new hemline with chalk or a washable pen.
- Cut off the extra fabric, leaving about 1 inch for the hem.
- Fold up the raw edge and pin.
- Use a stretch stitch or narrow zigzag around the flare.
This method gives a clean, store-bought look and survives many washes.
3. Blind Hem For A Hidden Finish
A blind hem makes the stitches almost invisible from the outside. Not all sewing machines have this option, but if yours does, it’s worth trying. Practice on scrap fabric first. Fold the hem so only a tiny bit of the outer fabric is caught by the needle. This keeps the flare smooth, with no visible stitches.
4. Serger Or Overlock Stitch
If you own a serger, you can finish the raw edge for a professional touch. This is great for thin or fraying fabrics. After serging, fold up the hem and use a stretch stitch to hold it. The result is a strong, flexible edge that won’t unravel.
Cutting Flare Leggings Without Losing Shape
One of the biggest worries is cutting too much and ruining the flare. Here’s how to cut safely:
- Lay your leggings flat on a table. Smooth out wrinkles.
- Measure the length you want to remove from the bottom.
- Use tailor’s chalk to mark a straight, even line around both legs.
- Cut slowly with sharp fabric scissors, following the curve of the flare.
- Always cut less than you think—you can always trim more, but you can’t add fabric back.
If you want to keep the original hem, see the next section.
Keeping The Original Hem
Many leggings have a special hem with a twin-needle finish. If you love the look, you can keep the original hem using a clever trick:
- Cut off the bottom hem, leaving about 1 inch above it.
- Shorten the leg by the needed amount (minus the hem width).
- Place the original hem edge back on the shortened leg, right sides together.
- Sew around with a stretch stitch, then flip down and press.
This way, your leggings look like they were never altered.
Adjusting The Flare Size When Shortening
Sometimes, after shortening, the flare looks wider or narrower than before. Here’s how to adjust:
- If the flare looks too wide, you can taper it slightly before hemming. Pinch in a small amount along the side seam and sew a new line.
- If it looks too narrow, check your cutting—did you cut off too much? If so, you might need to add a small wedge of similar fabric, but this is advanced.
Most of the time, careful cutting and hemming keep the flare in balance.
Professional Tailoring Vs. Diy
You might wonder if it’s better to take your leggings to a tailor. Here’s a quick comparison:
| Method | Cost | Time | Result Quality |
|---|---|---|---|
| DIY (Hand or Machine) | Low (mostly free) | 30-60 minutes | Good to Excellent |
| Fabric/Heat Tape | Low | 10-20 minutes | Fair to Good |
| Professional Tailor | Medium to High | 1-7 days | Excellent |
DIY is cheaper and faster, but a tailor gives perfect, long-lasting results. If your leggings are expensive or made from special fabric, professional help might be worth it.
Tools And Supplies You May Need
Having the right tools makes the job much easier. Here’s a list:
- Fabric scissors (sharp, for clean cuts)
- Sewing pins or clips
- Measuring tape (for accuracy)
- Tailor’s chalk (marks wash away)
- Sewing machine (with stretch stitch)
- Hand-sewing needle (for knits)
- Fabric/hem tape (for no-sew fixes)
- Iron and pressing cloth (for heat tape)
- Serger (optional, for best finish)
If you’re missing something, you can often borrow or improvise (for example, use small binder clips instead of pins in a pinch).
Step-by-step Example: Fixing Flare Leggings With A Sewing Machine
Here’s a full example using a sewing machine.
- Try on your leggings and decide how much to shorten. Mark with chalk.
- Take them off and lay flat. Double-check your marks are even on both legs.
- Cut off excess fabric, leaving about 1 inch for the hem.
- Fold the raw edge under, pin all around.
- Set your machine to a narrow zigzag or stretch stitch.
- Sew around the hem, stretching the fabric slightly as you go.
- Press the new hem with an iron to set the stitches.
Your leggings should now fit perfectly, with a neat hem that matches the original style.
Troubleshooting Common Problems
Sometimes things don’t go as planned. Here’s what to do if you run into trouble:
- Hem curls up: Try using more pins or press the hem before sewing.
- Fabric stretches out: Use a walking foot on your machine or a stabilizer under the fabric.
- Hem looks wavy: Check your tension settings. Go slow and don’t pull the fabric.
If you cut too short, don’t panic. You might be able to add a decorative lace trim or a matching fabric band to the bottom.
How To Maintain The New Hem
After fixing your leggings, take care to make the hem last:
- Wash on cold, gentle cycles
- Avoid high heat in the dryer
- Touch up with an iron if needed (use a cloth to protect synthetic fabric)
If you used fabric or heat tape, check occasionally to see if it’s coming loose.
Creative Ways To Shorten Without Cutting
If you want to avoid scissors, here are some fun ideas:
- Cuff the hem: Fold the bottoms outward for a sporty look. This works best with thicker fabrics.
- Tie a knot: Twist and tie the flare at the ankle for a trendy style. It shortens the leg and adds a unique touch.
- Use elastic bands: Tuck the extra length inside and hold in place with thin elastic bands.
These methods are great for casual days or when you want to change up your look.
How To Measure For The Right Length
Getting the length right is key to a good result. Here’s the best way:
- Put on the shoes you’ll wear most with the leggings.
- Stand straight and let the fabric fall naturally.
- Ask someone to help mark the spot where you want the hem to end. For most people, the flare should just skim the top of your foot.
- Mark both legs to make sure they match.
If you’re working alone, use a mirror and go slowly.
Preserving The Flare Shape
The most common beginner mistake is making the flare too narrow or uneven. Always:
- Cut slowly and check both legs before hemming.
- Avoid cutting straight across if your leggings have a curved flare—follow the existing line.
- Try on the leggings after pinning but before sewing or gluing the hem.
If you’re unsure, cut less and test. You can always trim more, but you can’t undo a cut.
When To Leave It To A Professional
Some situations are better handled by an expert:
- Leggings with complex seams or zippers at the flare
- Expensive or delicate fabrics like silk blends
- If you want a 100% invisible hem
A good tailor has tools and experience to keep the flare perfect. It’s an extra cost, but sometimes worth it for your favorite leggings.
How Flare Leggings Compare To Other Styles For Hemming
You might wonder if you can use the same hemming method as for skinny jeans or yoga pants. Here’s a quick comparison:
| Pant Style | Hemming Difficulty | Special Considerations |
|---|---|---|
| Flare Leggings | Medium | Keep flare shape, use stretch hem |
| Skinny Jeans | Easy | Straight cut, any stitch works |
| Wide-Leg Pants | Medium | Keep width even all around |
| Bootcut Leggings | Medium | Similar to flare, but less wide |
Flare leggings need more care than skinny or straight-leg styles, but with the right method, you’ll get great results.
Non-obvious Tips Beginners Miss
- Always pre-wash your leggings before hemming. Some fabrics shrink the first time you wash them. If you hem before washing, you might end up with leggings that are too short later.
- Test your hemming method on scrap fabric or the cut-off piece. This helps you get the tension, stitch, and tape just right before working on your actual leggings.
- If your leggings have side seams, line them up carefully before cutting or hemming. Uneven seams are easy to spot and look unprofessional.
Mistakes To Avoid
- Cutting both legs at once: Always do one at a time to avoid uneven lengths.
- Not measuring with shoes: The length changes with flat shoes vs. sneakers or boots.
- Using regular thread on stretch fabric: This can break when you move. Use polyester or stretch thread.
- Ignoring the flare: Folding too much fabric under can make the hem stiff and less “flary.”
How To Fix Leggings With Decorative Bottoms
Some flare leggings have lace, beads, or other decorations at the hem. If you need to shorten these:
- Remove the decoration carefully with a seam ripper.
- Shorten as usual.
- Reattach the decoration at the new hemline.
This keeps your leggings looking stylish and finished.
Caring For Your Leggings After Altering
After you’ve fixed the length, treat your leggings kindly:
- Wash inside out to protect the hem.
- Avoid using bleach or harsh chemicals, which can weaken stitches or tape.
- Store flat or fold neatly; don’t hang, as this can stretch out the fabric.
If you ever want to change the length again, a sewn hem is easier to adjust than a glued one.
How To Choose The Right Method
With so many options, how do you decide? Here’s a quick guide:
- For a fast, temporary fix: Fabric tape or safety pins
- For a permanent, professional look: Sewing machine with stretch stitch
- For delicate or expensive leggings: Consider a tailor
- For beginners: Try on scrap fabric first, or start with no-sew methods
The best method is the one that matches your skills, tools, and how much you value the leggings.
How To Add A Personal Touch
If you’re altering your leggings anyway, consider adding a small detail:
- Sew on a ribbon or lace trim at the new hem
- Add a small embroidered logo or symbol
- Use colored thread for a pop of contrast
Not only will your leggings fit better, they’ll also be one of a kind.
Learning Resources
If you want to learn more about sewing and hemming, many free resources are available. For a deep dive into hemming methods for stretch fabrics, visit the Craftsy Hemming Guide.
Frequently Asked Questions
How Do I Know How Much To Shorten My Flare Leggings?
Put on your leggings and the shoes you’ll wear most. Let the fabric fall naturally. Mark where you want the hem to end, usually just above the floor or top of your foot. Take them off, lay flat, and use a measuring tape to mark an even line around both legs.
Always measure twice to avoid mistakes.
Can I Shorten Flare Leggings Without Sewing?
Yes, you can use fabric tape, heat-bond tape, or safety pins for a no-sew solution. These methods are fast and don’t need special tools, but they might not last as long as sewing. For best results, use washable fabric tape.
Will Hemming Change The Shape Of The Flare?
If done carefully, hemming should not change the flare. Always follow the original curve when cutting and avoid folding too much fabric under the hem. Try on your leggings after pinning but before sewing to check the shape.
What Should I Do If I Cut My Leggings Too Short?
If you make them too short, you can add a fabric band, lace trim, or even reattach the original hem if you saved it. This adds length and can look like a design feature. For a perfect match, use fabric in a similar color and stretch.
Is It Worth Taking Flare Leggings To A Tailor?
If your leggings are expensive, made of delicate fabric, or have complex details, a tailor can give you a perfect result. For most everyday leggings, DIY methods work well and save money. If you value a flawless finish, professional tailoring is a good choice.
Perfectly fitting flare leggings are possible with the right method, a little patience, and careful measuring. Whether you choose a no-sew hack or a professional hem, your leggings can look and feel just right—no more dragging, tripping, or worn-out hems.
With these solutions, you’ll never have to pass up a stylish pair again just because the legs are too long.
Credit: lovall.com