
How to Design T Shirts at Home: Easy DIY Guide for Stunning Results
Designing your own t-shirts at home is more than just a creative hobby—it’s a way to express yourself and even start a small business. You don’t need advanced skills or expensive equipment to begin. With some basic tools, a bit of guidance, and a clear idea, you can turn plain tees into unique works of art.
Whether you want to make gifts, promote an event, or wear something that truly reflects your personality, learning the right techniques will help you create t-shirts that stand out.
Choosing Your T-shirt And Materials
The first step is picking the right t-shirt. Not all shirts are the same, and the material affects how your design will look and feel. Cotton is the most popular choice because it’s soft, comfortable, and easy to print on. If you want something lighter or stretchier, try polyester blends, but keep in mind that some methods work better on cotton.
Think about the fit and style. Some people prefer crew necks for classic looks, while others like v-necks or tank tops. Choose a color that matches your design idea. Light colors are easier for most methods, but dark shirts can look bold with the right materials.
Here’s a quick comparison of t-shirt materials to help you decide:
| Material | Best For | Print Quality | Comfort |
|---|---|---|---|
| Cotton | Beginner projects | High | Soft |
| Polyester | Sports, active wear | Medium | Lightweight |
| Cotton-Poly Blend | Everyday wear | Good | Durable |
| Rayon | Fashion tees | Low | Very soft |
For materials, you’ll need:
- Plain t-shirts (washed and dried)
- Transfer paper or vinyl sheets (for iron-on designs)
- Fabric markers or paint
- Stencils (optional)
- Iron or heat press
- Printer (for transfer designs)
- Cutting tools (scissors or craft knife)
Planning Your Design
Before you touch a shirt, you need a plan. A strong design starts with a clear idea and simple shapes. If you’re new, keep it basic—words, logos, or simple graphics. Sketch your idea on paper first, and decide where you want it on the shirt: front, back, sleeve, or pocket.
Digital tools can help you refine your design. Free apps like Canva or GIMP let you add text, shapes, and colors. Save your design as a high-resolution image—this will make printing easier and the result sharper.
A few tips:
- Use contrast: Light designs on dark shirts or vice versa.
- Avoid too much detail for your first try.
- Make sure text is large enough to read from a distance.
- Check for spelling mistakes before printing.
If you want to create your own artwork, scan it or take a clear photo. For copyright reasons, only use images you created or those labeled for free use.
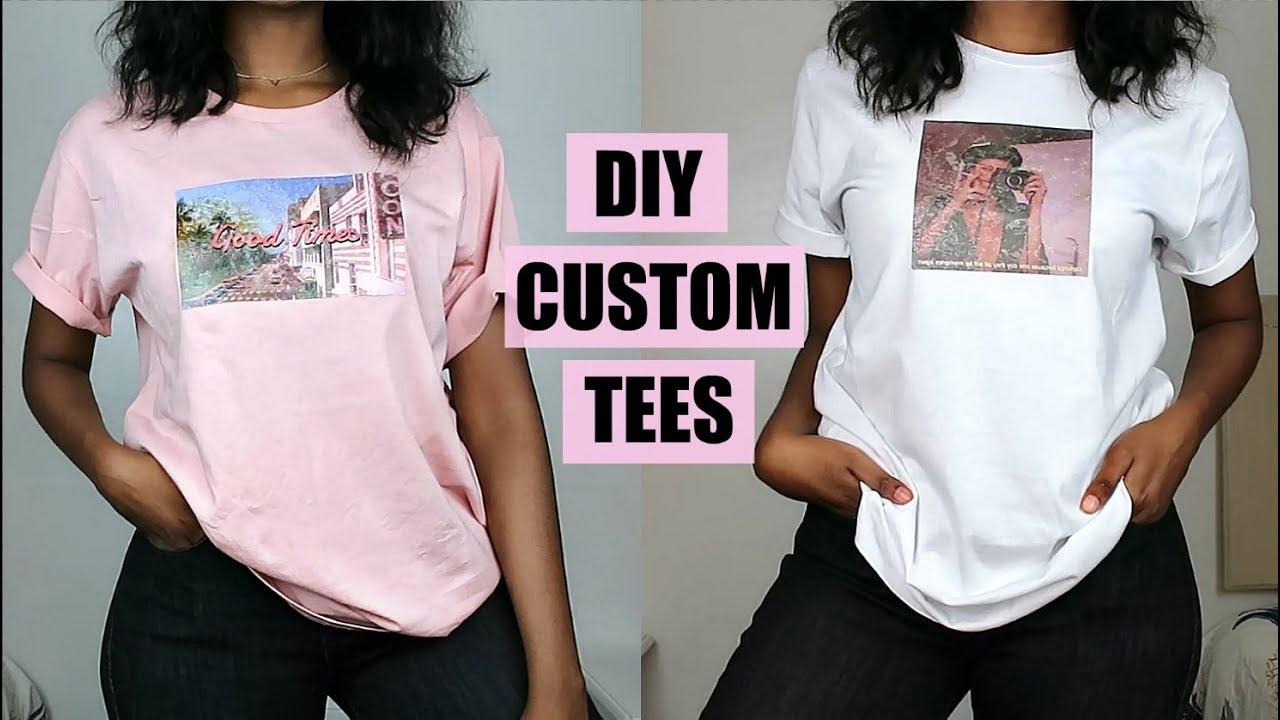
Credit: www.youtube.com
Methods For Designing T-shirts At Home
There are several ways to decorate a t-shirt at home. Each method has its pros and cons. Choose the one that suits your skill level, budget, and final look.
Iron-on Transfers
This is one of the simplest methods. You print your design onto transfer paper, then use an iron to apply it to your shirt. The result is a smooth, colorful print.
Steps:
- Print your design onto transfer paper using an inkjet printer.
- Cut out the design, leaving a small border.
- Place the transfer face down on the shirt.
- Press with a hot iron for several seconds (follow paper instructions).
- Peel away the paper slowly.
Iron-on transfers work best on cotton and light-colored shirts. The result is not as durable as professional prints, but it’s great for beginners.
Vinyl Cutting
Heat transfer vinyl (HTV) is a popular way to make bold, long-lasting designs. You cut shapes or letters from colored vinyl sheets, then use heat to stick them to your shirt.
Steps:
- Cut your design from HTV using scissors or a cutting machine (like Cricut).
- Place the vinyl on the shirt with the shiny side up.
- Cover with a thin cloth.
- Press with an iron for 10–15 seconds.
- Peel away the plastic backing.
Vinyl is great for simple designs and lasts through many washes. It works well on both light and dark shirts.
Fabric Paint And Markers
If you love hand-drawn art, fabric paint or markers let you create freeform designs. These are permanent and allow for lots of creativity.
Steps:
- Place a piece of cardboard inside the shirt to prevent bleed-through.
- Draw or paint your design directly onto the fabric.
- Let it dry completely (several hours).
- Iron the shirt to set the paint (follow paint instructions).
Use stencils for clean shapes, or go freehand for a personal touch. Fabric paint works on most materials, but check that your paint is suitable.
Stenciling
Stenciling helps you get neat shapes without freehand drawing. You cut a stencil from paper or plastic, then use paint or spray to fill in the design.
Steps:
- Cut your design from stiff paper or plastic.
- Place the stencil on the shirt and secure it.
- Apply paint with a sponge or brush.
- Remove stencil and let dry.
Stencils are great for repeating patterns or logos. Clean them well so you can reuse them.
Bleach Designs
For dark shirts, bleach can create cool patterns. It removes color wherever you apply it.
Steps:
- Make a stencil or use tape to mark your design.
- Spray or paint bleach onto the shirt.
- Wait a few minutes, then rinse with cold water.
- Wash the shirt to remove all bleach.
Bleach is powerful, so use gloves and work in a ventilated area. The result is a faded, unique look.
Embroidery
If you like sewing, embroidery adds texture and detail. You can stitch words, shapes, or small logos.
Steps:
- Draw your design lightly with pencil or chalk.
- Thread a needle with embroidery floss.
- Use simple stitches (backstitch, satin stitch) to follow your lines.
- Tie off at the end and trim excess thread.
Embroidery takes time but lasts for years. It works best on thicker fabrics.
Setting Up Your Workspace
To make t-shirt design safe and easy, set up a workspace with good lighting, a flat surface, and enough room to move. Cover your table with a plastic sheet or old towel to protect from spills. Keep all tools within reach.
If you’re using paint or bleach, open a window or use a fan for ventilation. Wear old clothes and gloves if needed. For iron-on methods, make sure your iron is clean and set to the right temperature.
Many people miss the importance of test runs. Always practice your technique on a scrap of fabric or an old shirt before working on your final piece. This helps you avoid mistakes and see how colors and materials behave.
Creating Your T-shirt Design: Step-by-step
Let’s walk through making a basic t-shirt design at home using iron-on transfer, one of the most accessible methods.
Step 1: Prepare Your Shirt
Wash and dry the shirt. This removes sizing chemicals and shrinks the fabric, so your design won’t warp later.
Step 2: Print Your Design
Create or download your design. Use a high-resolution image and mirror it before printing (especially if it includes text).
Print onto transfer paper. Make sure your printer settings are correct—choose “photo” quality for best results.
Step 3: Cut And Place The Transfer
Cut out your design carefully. Place it face down on the shirt where you want it.
Step 4: Apply Heat
Set your iron to “cotton” (no steam). Press firmly for 15–30 seconds, moving slowly to cover the whole area.
Step 5: Remove The Paper
Let the shirt cool for a minute. Peel the paper away slowly. If the design lifts, re-iron that area.
Step 6: Set The Design
Wait at least 24 hours before washing. For best results, wash shirts inside out and avoid high heat.
You can adapt these steps for vinyl, paint, or other methods.
Tips For Better Results
If you want your t-shirts to look professional, pay attention to these tips:
- Always pre-wash shirts to remove chemicals.
- Use a ruler or tape to center your design.
- Avoid overcrowding—leave space around your artwork.
- For text, choose fonts that are easy to read.
- Don’t rush drying time; paint and transfers need time to set.
- If using paint, add a small amount of water for smoother strokes.
- Store unused transfer paper in a dry place to prevent curling.
A common mistake is skipping the practice step. Testing your method on scrap fabric can save your main shirt from errors.

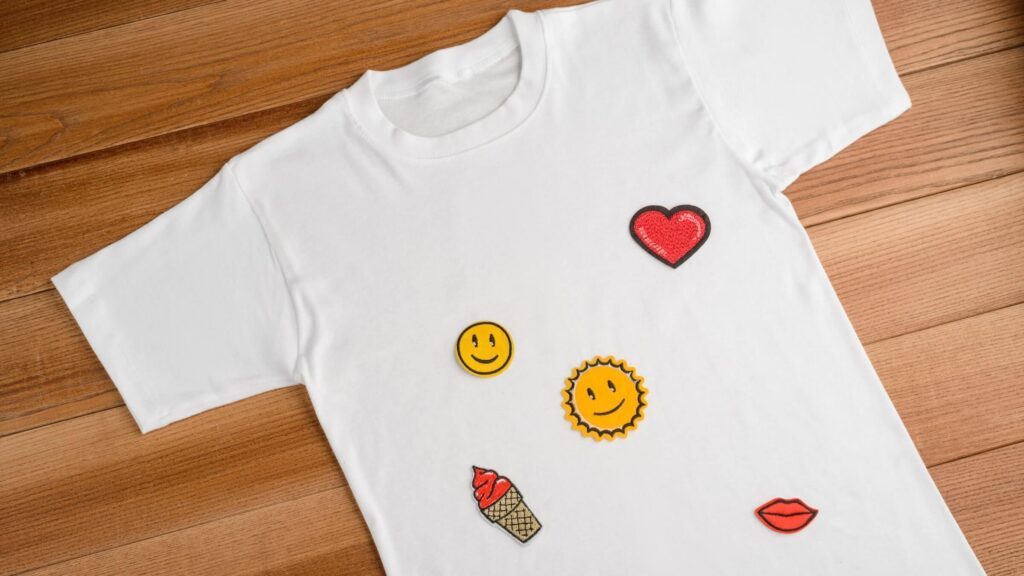
Credit: www.wikihow.com
Avoiding Common Mistakes
Designing t-shirts at home is fun, but some mistakes can ruin your hard work. Here are pitfalls to watch out for:
- Poor placement: Make sure your design is centered and not too high or low.
- Wrong temperature: Iron-on transfers need the right heat; too little and the design won’t stick, too much and it might burn.
- Not mirroring the image: For transfers, always flip the design so text reads correctly.
- Skipping pre-wash: This can cause shrinking and change how the design looks.
- Using the wrong paint: Regular paint will wash off; use fabric-specific products.
- Overcrowding the design: Simple designs stand out more.
- Ignoring copyright: Only use images you own or have permission to use.
Many beginners forget about washing instructions. Always wash your custom shirts inside out and in cold water to keep designs lasting longer.
Design Ideas For Inspiration
If you’re not sure what to put on your shirt, try these ideas:
- Quotes: Simple phrases or motivational words.
- Minimalist shapes: Geometric designs or single lines.
- Animal silhouettes: Easy to cut and apply.
- Event logos: For parties, reunions, or fundraisers.
- Hand-drawn doodles: Unique and personal.
- Abstract art: Splash paint or use random patterns.
- Nature scenes: Trees, leaves, or sunsets.
Mix and match styles. Try layering vinyl with paint or adding embroidery to a painted design.
Comparing Home Methods
Each t-shirt design method has strengths and weaknesses. Here’s a breakdown to help you choose:
| Method | Skill Level | Cost | Durability | Best For |
|---|---|---|---|---|
| Iron-On Transfer | Beginner | Low | Medium | Quick prints |
| Heat Transfer Vinyl | Intermediate | Medium | High | Bold designs |
| Fabric Paint | Beginner | Low | High | Hand-drawn art |
| Stenciling | Beginner | Low | Medium | Repeating patterns |
| Bleach | Intermediate | Low | Medium | Unique effects |
| Embroidery | Advanced | Low | Very High | Texture/detail |
Vinyl is more durable and professional, but requires a cutting machine for best results. Paint is flexible but needs careful drying. Iron-on transfers are fast and easy but may fade after several washes.
How To Make Your Designs Last
To keep your custom t-shirts looking new:
- Wash inside out in cold water.
- Use gentle detergent.
- Avoid bleach (unless it’s part of your design).
- Hang dry instead of using a dryer.
- Iron carefully—avoid direct heat on the design.
Some methods, like embroidery and vinyl, last longer than transfers or paint. If you want to sell shirts or wear them often, choose these for durability.
Starting A Small T-shirt Business
If you enjoy making t-shirts, you can turn your hobby into a small business. Start by making samples for friends or family. Take clear photos of your shirts and share them online. Set up a simple website or use platforms like Etsy.
Understand that quality matters. Buyers want shirts that look good and survive washing. Use high-quality materials and clear designs. Price your shirts based on material costs, time, and uniqueness.
You don’t need a huge budget. Many successful sellers start with basic tools and improve as they grow. For more inspiration, you can check out examples from Etsy—one of the world’s largest handmade marketplaces.
Diy Vs Professional Printing
Home designs are unique and personal, but professional printing offers some advantages:
| Feature | DIY | Professional |
|---|---|---|
| Cost | Low | High |
| Customization | Unlimited | Limited |
| Durability | Medium | High |
| Speed | Quick for small batches | Fast for large orders |
| Unique designs | Personal touch | Mass-produced |
If you need one or two shirts, DIY is best. For big events or business, professional printing may be better. Still, many people prefer the creativity and satisfaction of homemade designs.
Advanced Techniques For Enthusiasts
Once you master basic methods, try more advanced techniques:
- Screen printing: Requires special mesh screens and ink, but gives sharp results. It’s more complex but worth learning if you want to make many shirts.
- Sublimation: Uses heat to transfer dye into polyester fabric. Works only on light-colored polyester but gives vibrant, permanent colors.
- Foil printing: Adds shiny metallic designs using adhesive and heat.
- Layered vinyl: Combine multiple colors and textures.
These methods need extra tools and practice, but open up new creative possibilities.
Safety And Environmental Tips
Some materials, like bleach and paint, can be harmful if not used carefully. Always read instructions and wear gloves if needed. Dispose of chemicals properly and keep them away from children.
If you want a more eco-friendly approach, use organic cotton shirts and water-based inks. Reuse old shirts for practice, and choose methods that don’t produce a lot of waste.
Troubleshooting: Fixing Mistakes
Mistakes happen, but you can fix many of them:
- If a transfer lifts, re-iron it with more pressure.
- Paint smudges can be cleaned with a damp cloth before drying.
- Vinyl errors can sometimes be peeled off and replaced.
- If bleach spreads too much, add water to stop the reaction.
Don’t throw away shirts with small errors. Cover mistakes with patches or add extra paint. Sometimes, errors create new styles.
How To Photograph Your Designs
If you want to share your shirts online, good photos are important. Use natural light and a plain background. Hang the shirt or lay it flat. Take close-ups to show details.
Avoid using flash, which can make colors look strange. Edit photos to fix brightness, but don’t change the design itself.
Credit: printify.com
Frequently Asked Questions
How Do I Stop My Design From Fading After Washing?
Wash shirts inside out, use cold water, and gentle detergent. Avoid dryers and direct heat. For iron-on transfers and paint, wait at least 24 hours before the first wash.
Can I Use Regular Printer Paper For Transfers?
No. You need transfer paper made for fabric. Regular paper won’t stick or last. Transfer paper is available at craft stores or online.
What’s The Easiest Method For Beginners?
Iron-on transfers are the easiest. You only need a printer, transfer paper, and an iron. The process is simple and gives good results.
Are Homemade T-shirts Safe For Sensitive Skin?
Yes, if you use fabric-safe paint and wash the shirt before wearing. Avoid harsh chemicals like bleach unless you rinse thoroughly.
Can I Sell T-shirts With Copyrighted Images?
No. Only use images you created or those marked for free use. Copyrighted designs can lead to legal trouble. Always check image rights before selling.
Creating t-shirts at home is a rewarding process. You get to wear your art, share it with others, and even turn it into a business. With the right materials, careful planning, and attention to detail, your designs will stand out.
Don’t be afraid to try new techniques or fix mistakes—every shirt you make helps you improve. Start with simple methods, experiment, and have fun. Your next favorite tee could be one you make yourself.