
How to Design a Rash Guard: Ultimate Guide for Custom Styles
Are you ready to create a rash guard that fits your style and needs perfectly? Designing your own rash guard lets you stand out, stay comfortable, and protect your skin while you’re out in the water or at the gym.
But where do you start? This guide will walk you through simple, clear steps to design a rash guard that looks great and works even better. By the end, you’ll have the confidence to bring your unique design to life.
Keep reading, and let's make your perfect rash guard together!
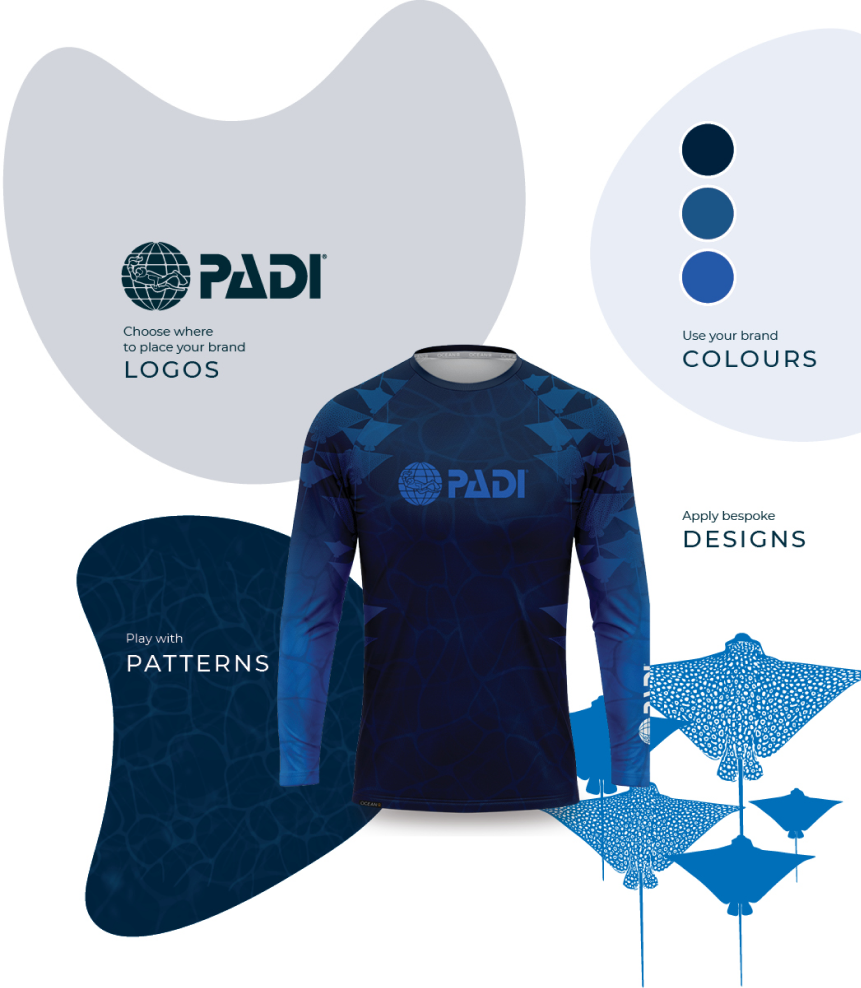
Credit: oceanr.co
Choosing The Right Fabric
Choosing the right fabric is key to designing a rash guard. The fabric affects comfort, protection, and how long it lasts. Picking the best material helps you stay cool and safe during activities.
Not all fabrics are equal. Some dry fast, others stretch more. Knowing fabric types helps you make smart choices for your rash guard.
Material Types
Common rash guard fabrics include polyester, nylon, and spandex blends. Polyester dries quickly and resists fading. Nylon feels soft and stretches well. Spandex adds stretch and flexibility. A mix of these materials offers good comfort and fit.
Breathability And Comfort
Breathable fabric lets air pass through easily. It helps your skin stay dry and cool. Look for lightweight fabrics with mesh panels or ventilation zones. Soft materials reduce skin irritation. Comfort matters for long hours of wear.
Durability Factors
Durable fabrics resist tears and stretching. They hold up well against sun, salt, and chlorine. Thicker weaves last longer but can feel heavier. Strong stitching and reinforced seams increase lifespan. Choose fabrics that keep their shape over time.
Selecting Colors And Patterns
Choosing the right colors and patterns is key to designing a rash guard. These elements set the tone and style of the garment. They can attract attention or blend in. Colors and patterns also show personality and mood. It is important to pick combinations that fit the purpose and wearer.
Popular Color Schemes
Bright colors like red, blue, and green are popular choices. They stand out in water and on land. Neutral tones such as black, white, and gray give a sleek look. Some designs mix bright and neutral shades for balance. Pastel colors are softer and work well for casual styles. Think about where the rash guard will be used when selecting colors.
Incorporating Patterns
Stripes and geometric shapes bring energy to the design. Camouflage patterns offer a rugged and outdoor feel. Floral or tropical prints add a fun and lively touch. Patterns can cover the whole guard or appear as accents. Use patterns to highlight certain body parts or create movement. Keep patterns simple if you want a clean look.
Color Psychology
Colors affect feelings and perceptions. Blue can calm and inspire trust. Red evokes energy and excitement. Green feels fresh and natural. Black suggests strength and sophistication. Yellow brings happiness and warmth. Choose colors that match the desired mood of the rash guard wearer. This helps the design connect with people.
Designing Logos And Graphics
Designing logos and graphics for a rash guard requires careful thought. These elements make the rash guard unique and appealing. Good design grabs attention and shows your style or brand clearly.
Focus on clarity and simplicity. Complex images may lose detail when printed on fabric. Choose designs that look good from a distance and up close. Colors should match the rash guard fabric and not fade quickly.
Placement Tips
Place logos and graphics where they stand out. Common spots include the chest, sleeves, and back. Avoid placing designs on curved or folded areas. These spots can distort the image.
Balance is important. Spread designs evenly to avoid crowded looks. Keep in mind how the rash guard will stretch during use. Designs should stay visible and clear.
Size And Scale
Choose the right size for each graphic. Large logos catch the eye but may overwhelm the design. Small graphics add detail without distraction. Adjust size based on placement and fabric area.
Keep proportions correct. Stretching or shrinking logos can reduce quality. Use measurements to maintain consistency across all rash guards. Think about how the design looks when worn.
File Formats For Printing
Use high-quality files for clear printing. Vector files like AI, EPS, or SVG are best. These files stay sharp at any size. Avoid low-resolution images like JPG or PNG for logos.
Prepare files in CMYK color mode. This matches print colors better than RGB. Include all fonts or convert text to outlines. This prevents font errors during printing.
Customizing Fit And Size
Customizing the fit and size of a rash guard is key to comfort and performance. A good fit protects your skin and lets you move freely. It also stops the rash guard from riding up or feeling tight in the wrong spots. Understanding how to measure, choose fits, and adjust for your activity helps you design the perfect rash guard.
Measuring For Accuracy
Start by measuring your chest, waist, and hips with a soft tape. Keep the tape snug but not tight. Measure your arm length from shoulder to wrist for sleeve fit. Write down these numbers to compare with sizing charts. Accurate measurements prevent buying rash guards that are too small or too loose.
Types Of Fits
Rash guards come in tight, regular, and loose fits. Tight fits hug the body for less drag in water. Regular fits offer comfort and some stretch. Loose fits give extra room for layering or casual wear. Choose the fit based on how you want the rash guard to feel.
Adjusting For Activity
Think about the activity you will do wearing the rash guard. For surfing or swimming, a tight fit stops water from entering. For yoga or gym workouts, a regular fit allows easy movement. For casual use or layering, a loose fit feels relaxed. Adjust the size choice to match your activity needs.
Printing Techniques
Printing techniques play a big role in designing a rash guard. The right method brings colors and patterns to life. It also affects how the design feels and lasts. Some methods work best for bold colors, others for detailed images. Understanding each printing technique helps you pick the perfect style for your rash guard.
Screen Printing
Screen printing uses a mesh screen to apply ink on fabric. It works well for bright, solid colors. This method is strong and lasts long after many washes. It is best for simple designs with few colors. Screen printing feels smooth and light on the rash guard.
Sublimation Printing
Sublimation printing uses heat to transfer dye into fabric fibers. It creates vibrant, full-color designs that do not fade. The print becomes part of the fabric, so it never peels or cracks. This technique works great on polyester materials. It is perfect for complex images and gradient colors.
Heat Transfer
Heat transfer applies a design by pressing a printed film onto fabric. It can produce detailed and colorful prints. This method is easy for small batches or custom designs. It feels slightly thicker on the fabric surface. Heat transfer works well for photos and logos on rash guards.
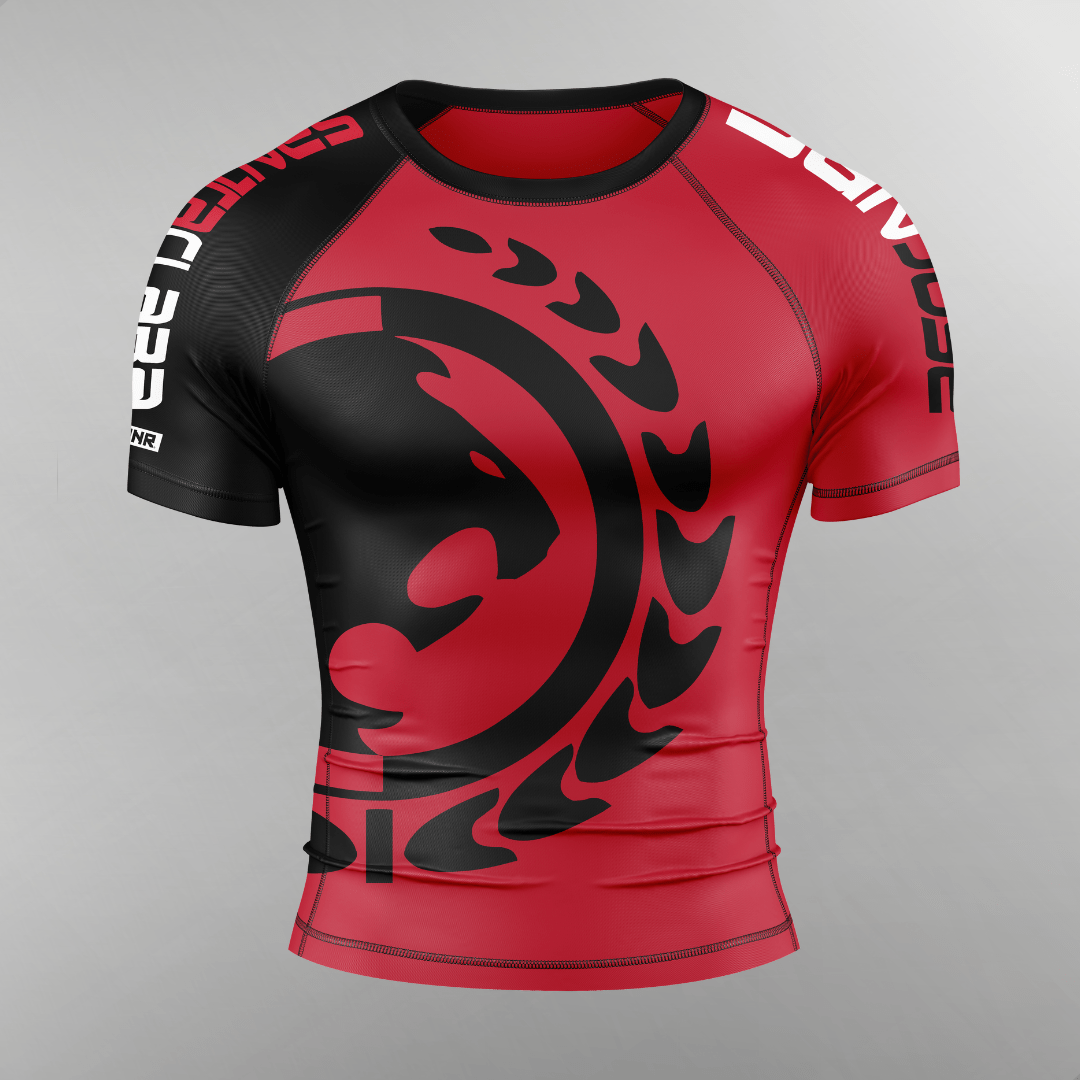
Credit: combatcorner.com
Adding Functional Features
Adding functional features to a rash guard improves comfort and performance. These features help protect your skin and keep you dry during water sports. Thoughtful design ensures the rash guard works well for different activities.
Seam Construction
Seam construction affects durability and comfort. Flatlock seams lie flat against the skin, preventing chafing. Strong stitching keeps the rash guard from falling apart. Reinforced seams add extra strength for tough use.
Uv Protection
UV protection shields your skin from harmful sun rays. Fabrics with built-in UV resistance reduce sunburn risk. Look for a UPF rating of 50 or higher. This feature is essential for long hours outdoors.
Moisture Wicking
Moisture-wicking fabrics pull sweat away from your body. This helps keep you dry and cool. Quick-dry materials speed up evaporation. Staying dry reduces irritation and improves comfort.
Budgeting And Production
Budgeting and production are key steps in designing a rash guard. Planning your costs early helps avoid surprises. Producing the rash guard means working with manufacturers and understanding their terms. Careful budgeting ensures your design process goes smoothly.
Cost Estimation
Estimate all expenses before starting production. Include fabric, printing, labor, and shipping costs. Don’t forget design fees if you hire a professional. Add a small buffer for unexpected expenses. This step helps keep your project on track financially.
Minimum Order Quantities
Manufacturers usually require a minimum order quantity (MOQ). This is the smallest number of rash guards you can order at once. MOQs vary by supplier and can affect your budget. Choose a MOQ that fits your needs and budget well.
Choosing A Manufacturer
Select a manufacturer with good quality and fair prices. Check their reviews and ask for samples. Communication is important; pick a manufacturer who responds quickly. Look for one experienced in sportswear or rash guards. This choice impacts the final product quality and delivery time.
Testing And Quality Control
Testing and quality control are key steps in designing a rash guard. These steps ensure the product meets high standards. Good testing can catch flaws early. It helps create a rash guard that lasts and feels great.
Sample Testing
Sample testing checks the first version of the rash guard. It looks at fabric strength and color fastness. Tests simulate real use, like swimming or sun exposure. This step reveals any early problems with materials or prints.
Fit And Comfort Checks
Fit and comfort tests make sure the rash guard fits well. Testers wear it during different activities. They check if it feels tight or loose. Comfort is important for long wear. The rash guard should move with the body without causing irritation.
Durability Assessments
Durability tests measure how long the rash guard lasts. These include washing and stretching tests. The fabric should not fade or tear easily. Strong stitching and seams are also checked. This ensures the rash guard stays in good shape after many uses.
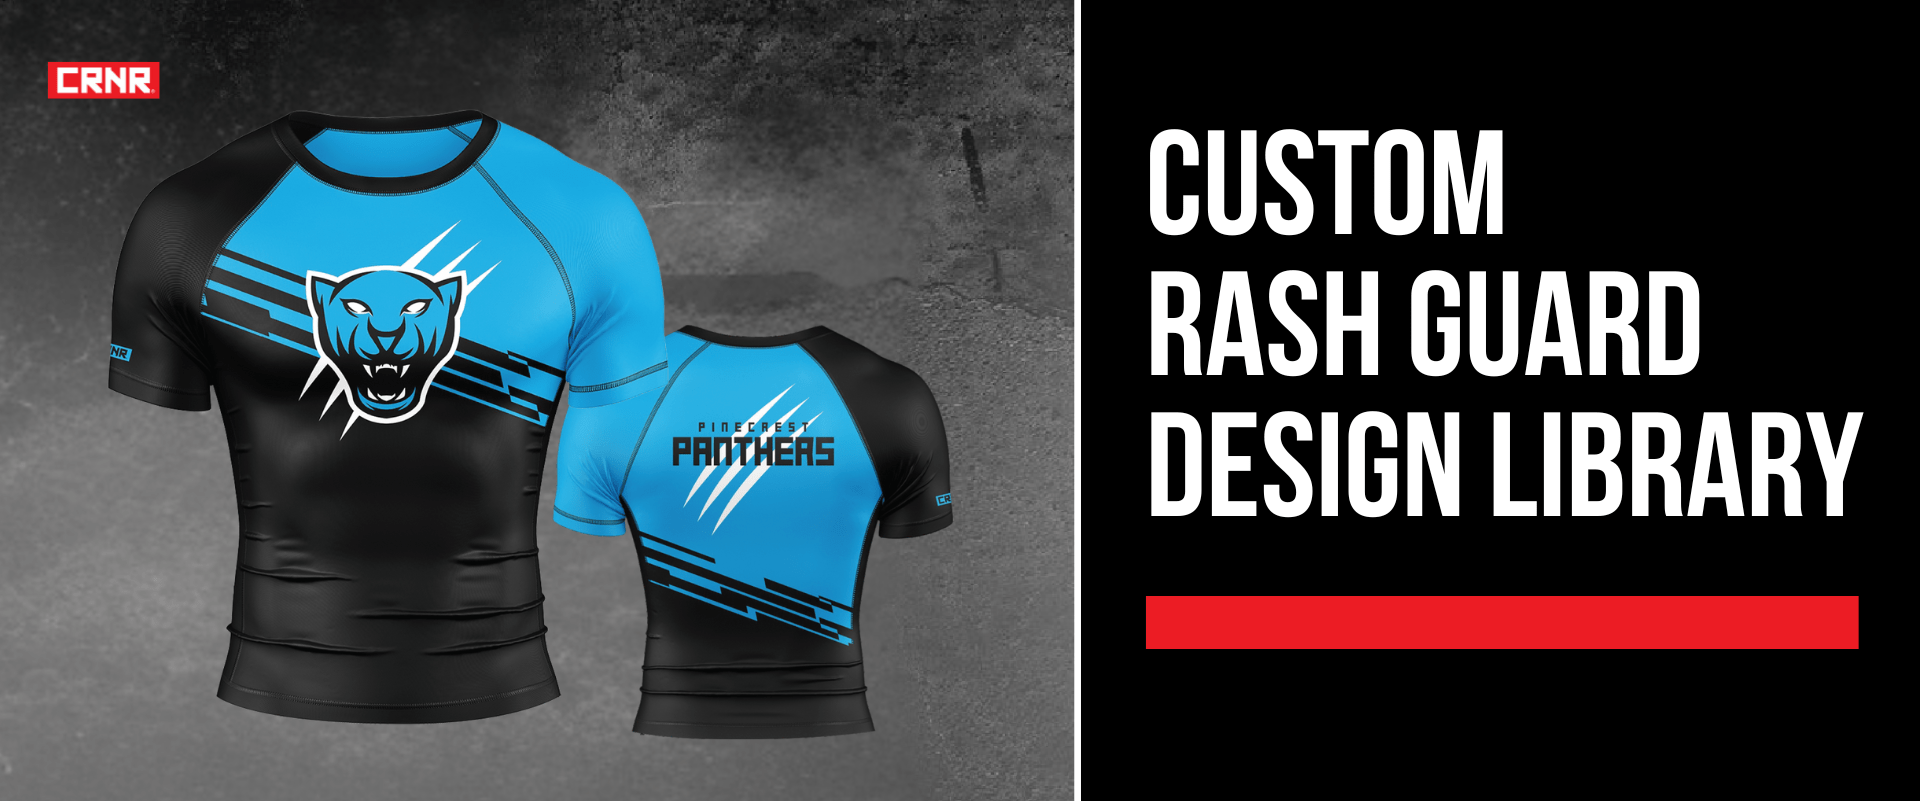
Credit: combatcorner.com
Frequently Asked Questions
What Materials Are Best For Designing A Rash Guard?
The best rash guard materials are polyester and spandex blends. They offer flexibility, durability, and quick-drying properties. These fabrics provide comfort and protect skin from UV rays and abrasions during water sports or workouts.
How Do I Choose The Right Rash Guard Size?
To choose the right size, measure your chest and waist accurately. Check the brand’s size chart before ordering. A snug fit ensures maximum protection and comfort without restricting movement.
What Design Elements Enhance Rash Guard Functionality?
Functional design elements include flatlock seams to reduce chafing, UV protection fabric, and mesh panels for breathability. These features improve comfort, durability, and performance during active use.
Can I Customize Colors And Logos On Rash Guards?
Yes, most manufacturers allow customization of colors, logos, and patterns. This helps create unique designs for teams, brands, or personal style while maintaining product quality and fit.
Conclusion
Designing a rash guard takes planning and creativity. Choose the right fabric for comfort and protection. Think about colors and patterns that match your style. Add features like zippers or mesh for better use. Keep your design simple but effective.
Test your rash guard for fit and durability. A well-made rash guard helps you stay safe and comfortable. Enjoy creating a design that suits your needs perfectly.