
Can You Flare Pants: Styling Tips for a Trendy Look
Can You Flare Pants
Flares are back in style, and many fashion lovers are asking: can you flare pants yourself? Maybe you have a favorite pair of jeans that feel a bit outdated, or you found some straight-leg trousers in your closet that need a fresh look. The good news is, yes—you can flare pants at home, and you don’t need to be a professional tailor to do it. This guide will walk you through everything you need to know, from choosing the right pants and materials to step-by-step DIY instructions, style tips, and even the mistakes people often make. By the end, you’ll feel ready to give old pants a new life and rock your own unique style.
Understanding Flared Pants
Before you start, it helps to know what flared pants really are. Flared pants are fitted at the waist and thighs, then widen out from the knee down. The flare can be subtle or dramatic, depending on your taste. Once popular decades ago, they’re now a favorite in many modern wardrobes because they make legs look longer and add movement to any outfit.
Flared pants come in different styles, including bell-bottoms, bootcut, and wide-leg. Each type has its own vibe, but the idea is always the same: the pants get wider below the knee. Understanding this shape is key before you try to flare your own pants.
Why Flare Your Own Pants?
There are many reasons to flare pants yourself instead of buying new ones:
- Personalization: You can make pants that fit your body and style perfectly.
- Sustainability: Upcycling old jeans or trousers means less waste.
- Cost-effective: DIY flaring is usually much cheaper than buying a new pair.
- Creativity: You can choose fun fabrics, colors, and even add details like embroidery.
Many people also like the challenge and satisfaction of wearing something they made themselves. Plus, flared pants are very versatile—they work for casual, office, and even party looks.
Credit: www.whatwonderwomenwear.com
Choosing The Right Pants To Flare
Not every pair of pants is a good candidate for flaring. Some materials and cuts work better than others.
Best Fabrics For Flared Pants
- Denim: Classic choice, especially for jeans. Medium to heavy weight denim works best.
- Cotton twill: Sturdy and holds shape well.
- Polyester blends: Many dress pants use these; easy to sew and drape nicely.
- Corduroy: Unique texture, also strong enough for flares.
Avoid very thin or stretchy fabrics, as they may not hold the flare shape and can look sloppy.
Ideal Pant Cuts
- Straight-leg: Easiest to convert, as the leg shape is simple and even.
- Bootcut: Already has some flare, so you can make it more dramatic.
- Slightly tapered: Possible to flare, but you may need to adjust the knee area.
Skinny jeans or very tight pants are harder to flare because there may not be enough fabric at the knee. Wide-leg pants don’t need flaring—they’re already wide.
Pant Condition
Choose pants that are in good condition, especially around the seams and hem. Worn-out fabric can tear easily when you start cutting and sewing.
Tools And Materials Needed
Before you start your project, gather these tools and materials:
- Sewing machine: Makes the job much faster and neater.
- Fabric scissors: Sharp scissors for smooth cutting.
- Pins or clips: To hold fabric pieces together.
- Seam ripper: For opening up side seams.
- Measuring tape: For accurate measurements.
- Chalk or fabric marker: To mark where to cut and sew.
- Extra fabric: This will become the flare insert. Choose a color or pattern that matches or contrasts with your pants.
- Thread: Choose a color that matches your pants or the insert fabric.
- Iron: For pressing seams.
If you don’t have a sewing machine, you can sew by hand, but it will take more time and effort.
Credit: www.youtube.com
Planning Your Flare Style
There are several ways to flare pants, and the look you want will affect your steps. Here are the most common flare styles:
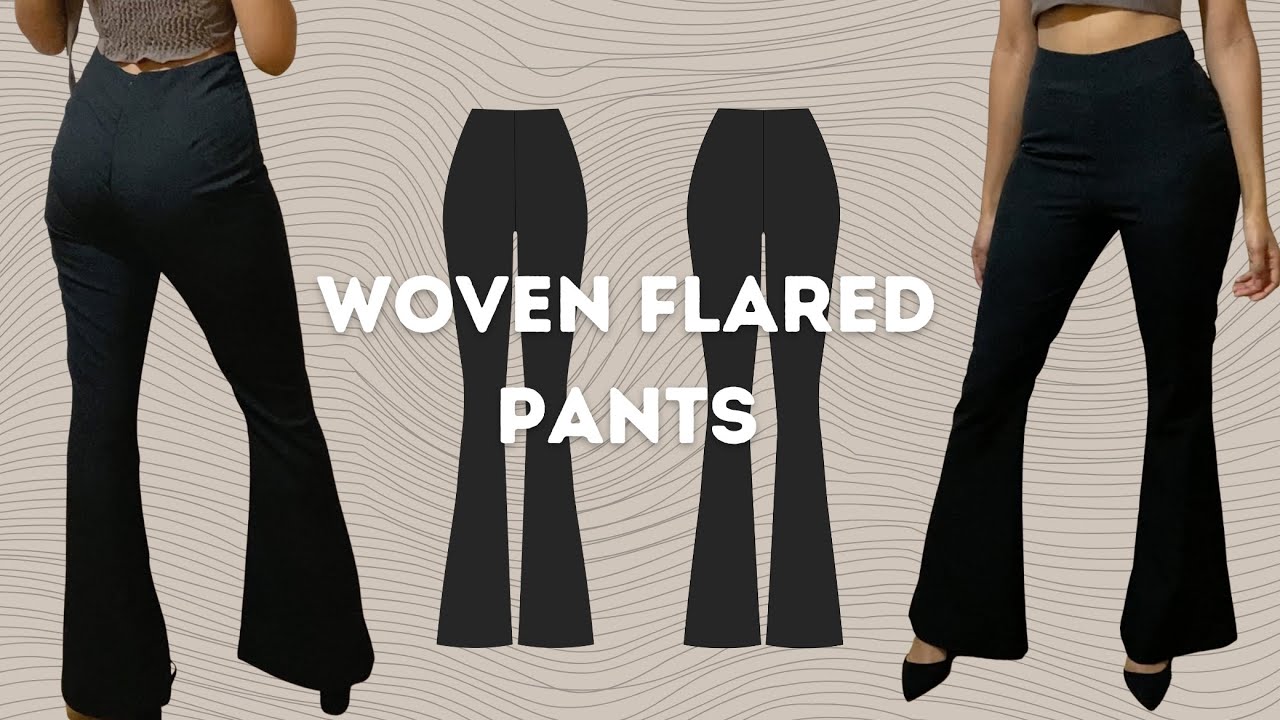
- Classic bell-bottom: Very wide flare, dramatic look.
- Subtle bootcut: Slight flare, more understated.
- Contrast panel: Use a different fabric for the flare insert, adding color or texture.
- Raw-edge flare: Leave the hem unfinished for a casual or boho look.
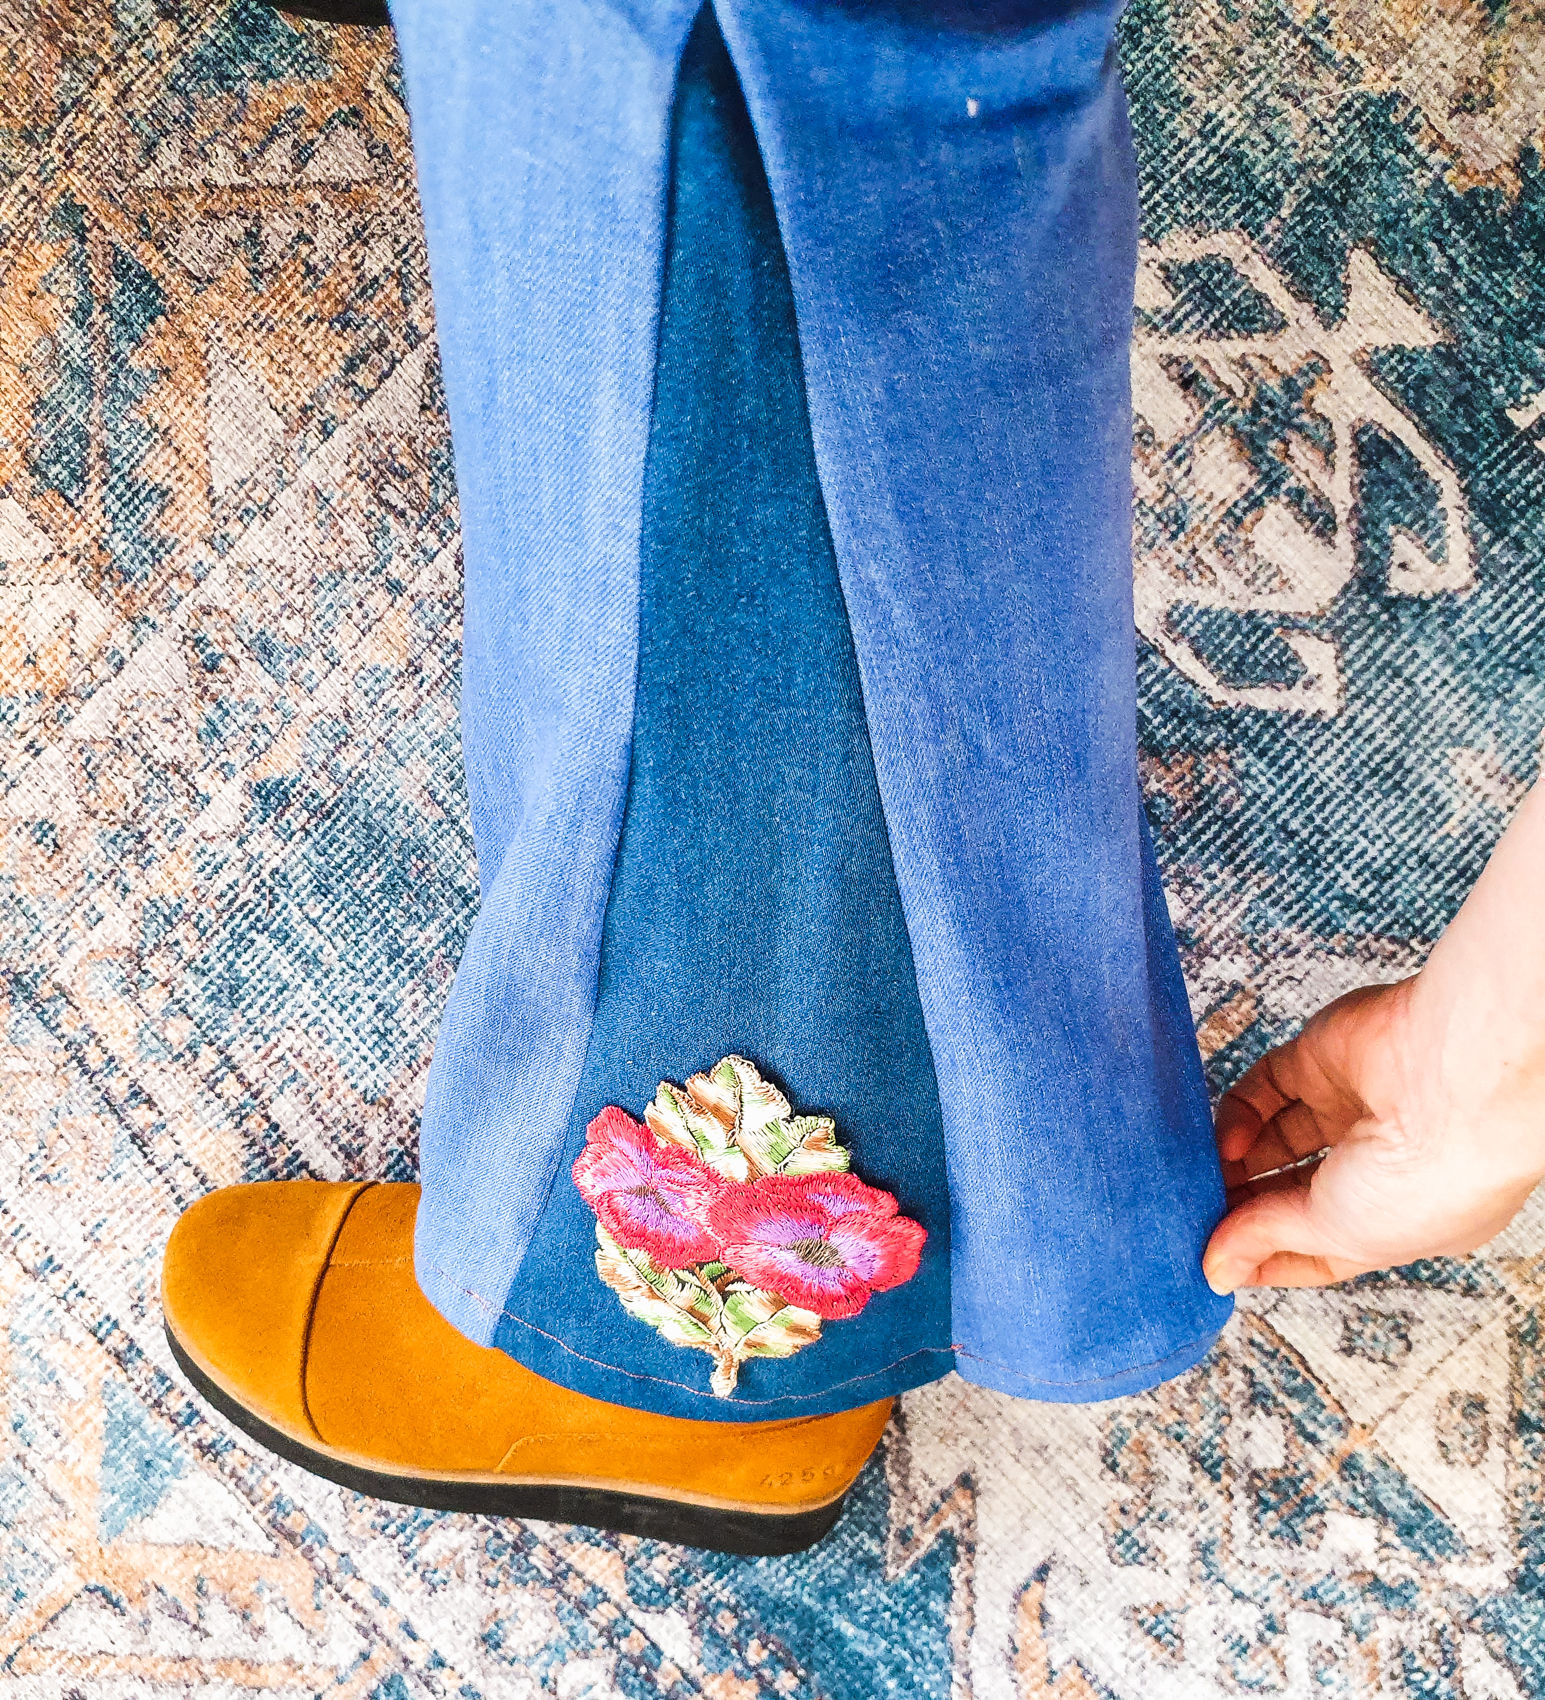
- Embellished flare: Add embroidery, studs, or patches to the flare area.
Think about where you’ll wear the pants and what will match your wardrobe. If you want a vintage vibe, classic bell-bottoms or contrast panels work well. For everyday wear, a simple bootcut is easy to style.
Step-by-step Guide To Flaring Pants
Here’s a detailed guide to flaring pants yourself, even if you’re a beginner.
1. Measure And Plan
Wear the pants and decide where you want the flare to start—usually just below the knee. Use a measuring tape to mark this spot with chalk on both legs.
Decide how wide you want the flare at the bottom. A 5-10 inch (13-25 cm) added width per leg is common for a moderate flare. For a dramatic bell-bottom, add more.
2. Open The Outer Side Seams
Take off the pants and turn them inside out. Use a seam ripper to carefully open the outer side seam from your knee mark down to the hem.
If the pants have pockets or details near the side seam, you may need to adjust where you open the seam. Be careful not to cut into the pocket lining.
3. Cut The Insert Fabric
Lay your pants flat and measure the opening you just created. Cut a triangular piece of your insert fabric. The top of the triangle should match the length of the open seam at the knee, and the bottom should be as wide as your desired flare.
Add about 1/2 inch (1. 3 cm) extra on each side for seam allowance.
4. Pin And Sew The Insert
Pin the insert fabric into the open seam, right sides together. Make sure the insert is even on both the front and back of the pants. Check that the flare looks balanced.
Sew the insert fabric to the pants, using a straight stitch. If you’re new to sewing, go slowly and keep your lines as straight as possible.
5. Finish The Seams
Trim any excess fabric and use a zigzag stitch or an overlock stitch to finish the raw edges inside. This prevents fraying.
Press the seam open with an iron for a neat finish.
6. Hem The Pants
Try on the pants and check the length. If needed, trim the hem so the pants don’t drag on the ground. Fold up the hem, pin it, and sew around the bottom for a clean edge.
For a raw-edge look, skip hemming and let the fabric fray naturally.
7. Final Touches
Press all seams and the hem for a crisp look. Try on your pants and admire your work!
Common Mistakes And How To Avoid Them
Even experienced DIYers can make mistakes when flaring pants. Here are some common problems and how to fix or avoid them:
- Uneven flare: Always measure and pin both legs before sewing. Try on the pants after pinning to check symmetry.
- Insert fabric mismatch: Make sure your insert fabric is similar in weight and stretch to your pants. If the insert is much lighter or heavier, the pants will hang strangely.
- Seam puckering: Use the right needle and thread for your fabric. Press seams as you sew to keep them flat.
- Too short after hemming: Always try on pants before trimming the hem. Remember to leave extra length if you’ll wear heels.
- Visible stitch lines: Use thread that matches your fabric, or make the stitches a design feature with a contrasting color.
Table: Comparison Of Flare Styles
Below is a comparison of popular flare styles for pants:
| Flare Style | Width at Hem | Best For | Style Impact |
|---|---|---|---|
| Classic Bell-Bottom | Very Wide | Statement Looks | Retro/Vintage |
| Subtle Bootcut | Moderate | Everyday Wear | Casual/Office |
| Contrast Panel | Wide or Moderate | Creative Outfits | Unique/Artsy |
| Raw-Edge Flare | Any | Boho Styles | Relaxed/Youthful |
Credit: pumpsandpushups.com
Creative Ideas For Flared Pants
Flared pants are a blank canvas for your creativity. Here are some ways to make them stand out:
- Patchwork inserts: Use fabric scraps in different colors or patterns for a funky, unique flare.
- Embroidery: Add simple designs along the flare, like flowers or geometric shapes.
- Beads or sequins: Hand-sew decorations onto the flare for a festival or party look.
- Lace panels: For a feminine touch, use lace as your flare insert.
- Denim-on-denim: Use a lighter or darker denim for the insert, creating a cool contrast.
When choosing creative details, consider how often you’ll wear the pants and how easy they are to wash and care for.
Table: Flare Insert Fabric Options
The type of fabric you use for the flare insert changes the look and feel of the pants. Here’s a quick comparison:
| Fabric Type | Advantages | Disadvantages | Best For |
|---|---|---|---|
| Denim | Durable, matches jeans | Can be stiff, hard to sew | Everyday wear |
| Cotton | Easy to sew, many colors | May wrinkle, can fray | Casual or creative pants |
| Lace | Elegant, lightweight | Delicate, can snag | Dressy styles |
| Corduroy | Warm, textured | Bulky, limited colors | Fall/winter pants |
| Printed Fabric | Bold, unique | May clash with pants | Statement pieces |
Caring For Flared Pants
After all your hard work, you want your flared pants to last. Here are some tips for caring for them:
- Wash gently: Use cold water and a gentle cycle, especially if you used delicate fabric for the insert.
- Air dry: High heat can shrink or damage fabrics. Hang pants to dry.
- Iron with care: Use the right setting for your fabric. Press the seams flat for a neat look.
- Repair quickly: If you see any loose threads or tears, fix them right away so they don’t get worse.
Styling Tips For Flared Pants
Flared pants can be very flattering if styled well. Here are some tips to make them work for you:
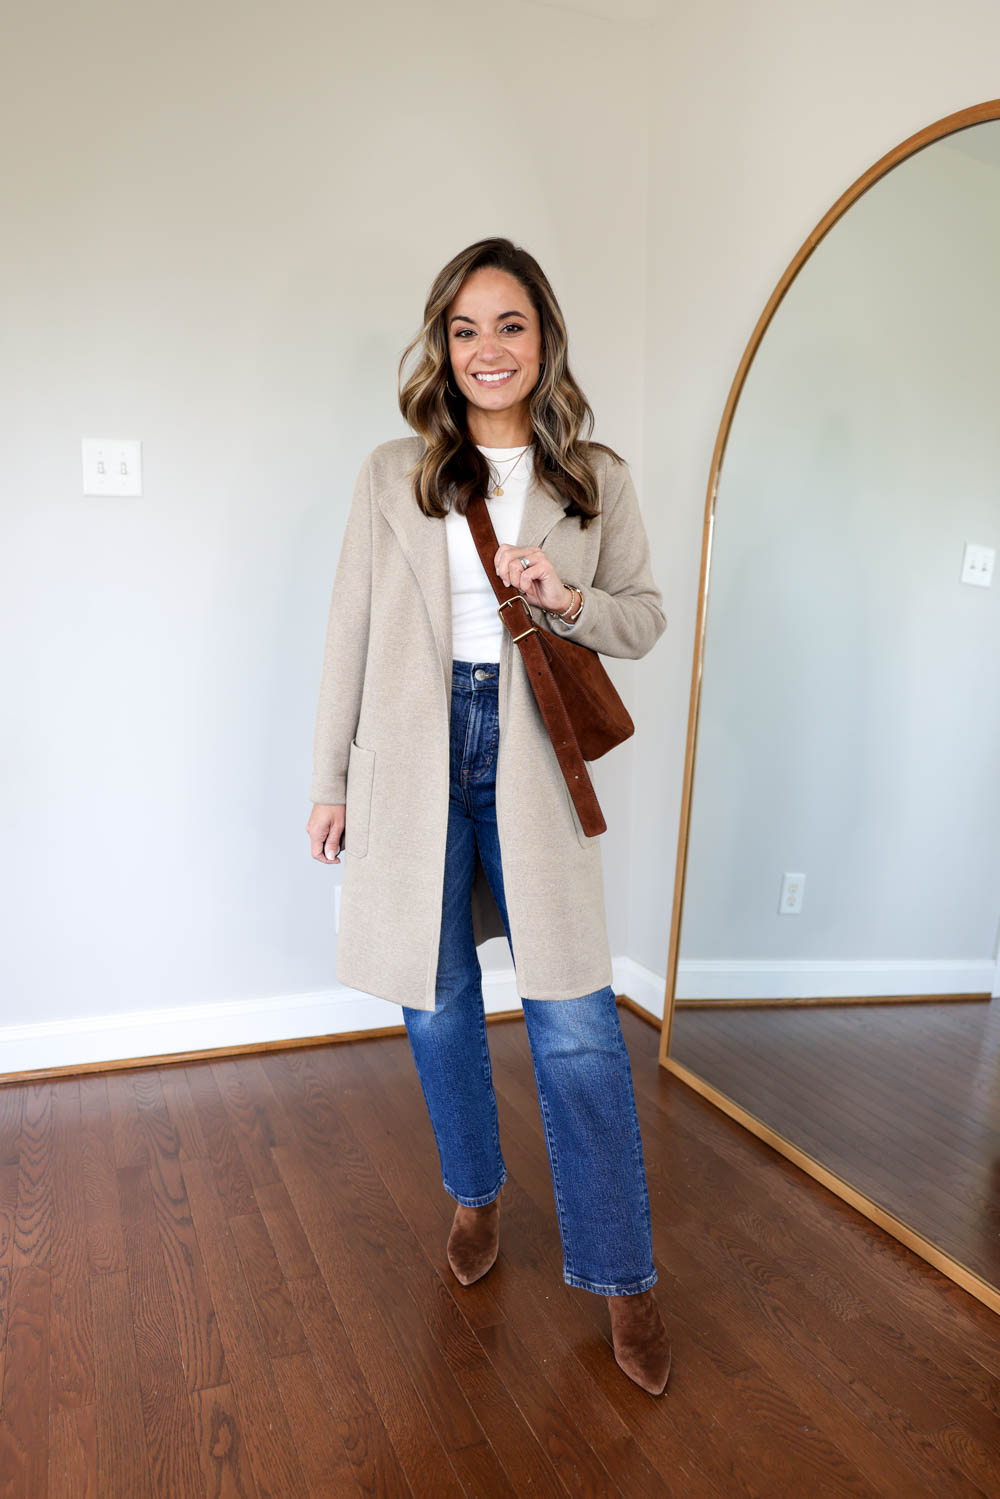
- Balance proportions: Pair flared pants with a fitted or tucked-in top to show your waist.
- Choose the right shoes: Heels or platform shoes make your legs look longer, but flats or sneakers also work for a casual look.
- Layer smartly: Short jackets or cropped sweaters keep the focus on the flare.
- Accessorize: Belts, hats, or simple jewelry can complete the outfit without competing with the pants.
If you’re new to flared pants, start with a basic color and style, then try bolder looks as you feel more confident.
Table: Flared Pants Vs. Other Pant Styles
To help you decide if flared pants are right for you, here’s a comparison with other popular styles:
| Pant Style | Fit | Best For | Key Feature |
|---|---|---|---|
| Flared | Fitted at top, wide at bottom | Making legs look longer | Wide hem |
| Straight-Leg | Same width all through | Classic, versatile | Simple shape |
| Skinny | Tight all over | Modern, casual | Body-hugging |
| Wide-Leg | Loose from hip down | Comfort, relaxed style | Very wide, even shape |
| Bootcut | Fitted, slight flare | Everyday, boots | Small flare at hem |
Non-obvious Insights For Beginners
When you start flaring pants, you might miss a few details that make a big difference. Here are two important tips:
- Start with thrifted or old pants: Your first attempt may not be perfect. Use pants you don’t mind experimenting on, so you can learn without stress.
- Try basting first: Before sewing the insert permanently, use a loose, temporary stitch (basting) to test the fit and flare. This way, you can make changes easily before final sewing.
Another tip: If you’re not confident with sewing straight lines, use painter’s tape or masking tape as a guide on the fabric. Sew right next to the tape for cleaner results.
Flared Pants In Fashion And Culture
Flared pants have deep roots in fashion history. Originally worn by sailors, they became a symbol of counterculture and freedom in the past. Today, they’re a staple for those who love mixing vintage and modern styles.
Many celebrities and designers have brought flared pants back into the spotlight, showing that they’re not just a trend—they’re a statement. Flared pants are also popular in many cultures around the world, used for dance, casual wear, and even formal occasions.
For more on the history and impact of flared pants, check out this comprehensive source: Wikipedia: Bell-bottoms.
When Not To Flare Pants
While flaring pants is fun and creative, it’s not always the best choice. Here are situations when you might want to skip it:
- Very tight pants: There may not be enough room at the knee to add a flare.
- Thin, delicate fabrics: These can tear or fray easily, making flaring difficult.
- Pants with complex side seams: If the pants have zippers, buttons, or decorations along the side, flaring can be tricky.
- If you need a professional finish: DIY flaring can look homemade if you rush or use the wrong materials.
In these cases, it’s better to buy ready-made flared pants or ask a professional tailor for help.
Frequently Asked Questions
What Kinds Of Pants Can I Flare At Home?
You can flare straight-leg, bootcut, or even slightly tapered pants made from sturdy fabrics like denim, cotton, or corduroy. Avoid flaring skinny jeans or very stretchy materials, as they are hard to work with and may not hold the flare shape.
How Much Fabric Do I Need For The Flare Insert?
The amount depends on how dramatic you want the flare. For a moderate look, about 1/4 yard (23 cm) per leg is usually enough. For very wide bell-bottoms, you may need more. Always measure and cut extra fabric, as it’s easier to trim than add more later.
Do I Need A Sewing Machine To Flare Pants?
A sewing machine makes the process faster and neater, but you can sew by hand if needed. If you hand-sew, use small, even stitches and strong thread to make sure the insert is secure.
Can I Remove The Flare Later If I Change My Mind?
Yes, if you sew the flare insert to the side seam, you can remove it later by carefully unpicking the stitches. However, there may be small holes or marks left in the fabric, especially if you used thick thread or heavy stitching.
How Do I Style Flared Pants For Different Occasions?
For casual days, pair flared pants with sneakers and a T-shirt. For work, wear them with a blouse and heels. To dress up, add a fitted top, statement jewelry, and platform shoes. The key is to balance the wide leg with a more fitted upper body for a polished look.
Flared pants are a fun, expressive way to update your wardrobe without buying new clothes. With a bit of planning, the right materials, and patience, you can transform old pants into something truly special. Remember, the first try is always a learning experience—each pair will get better as you practice.
Enjoy the process and wear your new flares with pride!